Powering the QR Clock
The QR clock is powered by a standard 5V, 2A micro-usb phone charger. Plugging a micro-usb cable into your computer may not provide enough current for the clock to operate and is not recommended.
Setting the Time
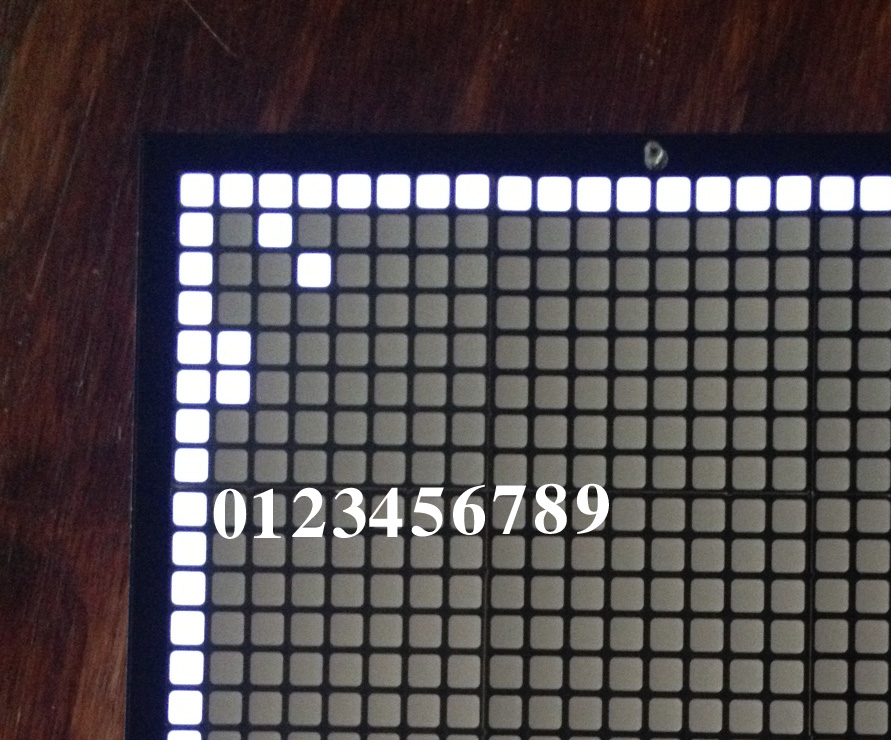
Upon power up, the QR clock will enter time set mode. In time set mode, the time is displayed in a somewhat human readable format. Each row represents a different digit of the time, and each column represents a different value. The columns are numbered as follows:
The rows represent the following (in order from top to bottom)
- Tens digit, hours (if applicable)
- Ones digit, hours
- Blank row
- Tens digit, minutes
- Ones digit, minutes
- Blank space (if displaying seconds)
- Tens digit, seconds (if displaying seconds)
- Ones digit, seconds (if displaying seconds)
- AM/PM indicator. Pixel is lit for PM.
Bear in mind that LEDs displaying a particular digit may move up or down if digits are inserted above them. For example, when changing from 9PM to 10PM, all of the LEDs will shift down to make room for the Tens digit.
To adjust hours, tap SW2 on the rear of the clock for a short period. To adjust minutes, tap SW1. Adjusting either will reset the seconds count.
After 30 seconds of inactivity, the clock will begin to display the time in a QR code. To return to time set mode at any time, simply tap one of the buttons again.
Adjusting Display Mode
The bottom and right edge of the clock’s display can display multiple different patterns:
- Snake – A lit trail of LEDs will travel along the edge of the clock advancing one pixel for every second. This is the default pattern.
- Black out – All of the LEDs remain off.
- White out – All of the LEDs remain on.
To adjust the display mode, hold SW1 for about a second and release.
The clock can also be set to display seconds. To alternate this setting, press and hold SW2 for about a second and release.
Mounting Guide
It can be difficult to gauge exactly how high your clock will sit while hammering in your nail. This guide should help. It allows you to easily see where the mounting holes are in relation to the LED display.
DIY Version
If you’ve purchased one of the DIY clocks with colored LEDs, here are some tips for assembly:
- Pin 1 of the LED modules is marked with black marker.
- Don’t lose the ambient light sensor! It’s stuck in the foam packaging. Insert it with the long lead facing the rest of the circuit.
Additional Information
Schematic and firmware files can be found here (updated 4/2/2015): QR Clock v2.2.
Alternate firmware by Maximilien Cuony: adds 24 hour support and fixes compile time warnings. Available here.


Pingback: Optimizing the QR Clock | ch00ftech Industries
Pingback: The Slowest $380 I’ll Ever Make | ch00ftech Industries
Pingback: QR-Uhr: Vollkommen unnütz – aber interessant | Labelfox
The link to the alternative firmware goes to an empty pastebin-like page.
You’re right. Didn’t realize it had a expiration date. I’ll have to see about getting a new link from its author.