
It’s baaaack!
Motivation
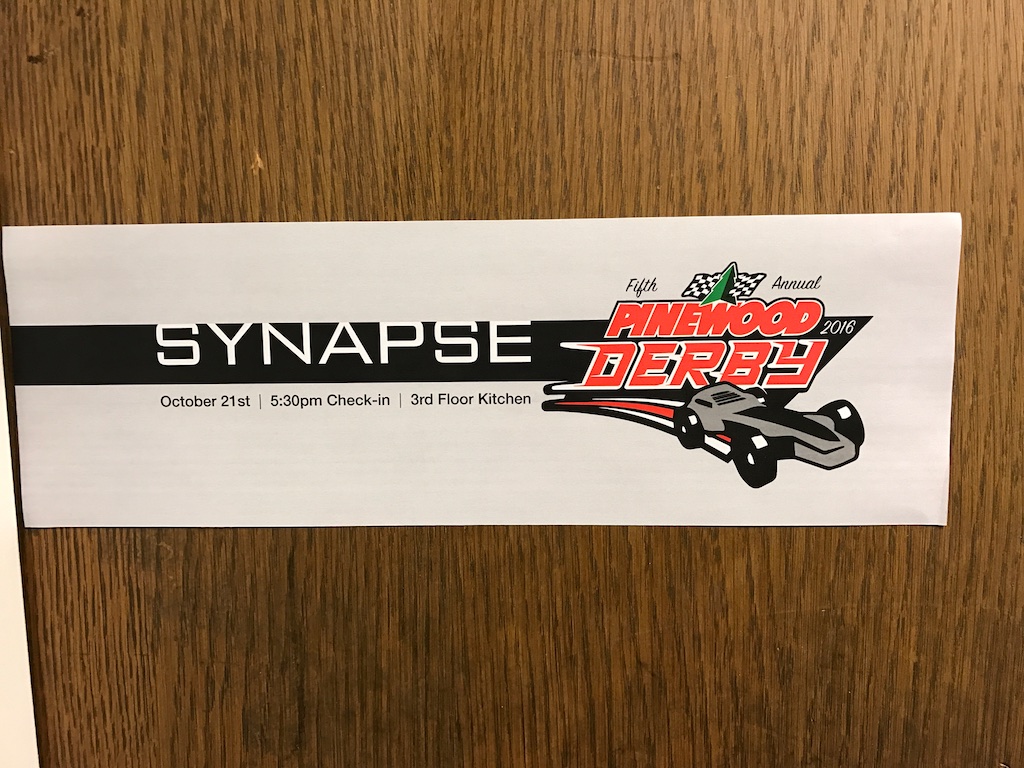
A little over a year ago, my company hosted a pinewood derby race. For those of you who aren’t familiar with the format, it’s a competition where kids (or let’s face it, their parents) make small wooden cars that coast down a track in an effort to see whose car is the fastest. For my company’s event, we abandon all pretense and just let the adults compete alongside their kids.
There are a lot of regulations for this type of race including the maximum dimensions and weight of the cars and even the types of materials allowed (can’t lubricate the wheels with graphite apparently. Seriously, when did that become a rule?). I’m not sure if the rules explicitly state this, but there’s sort of an understanding that any sort of motor placed on the car would disqualify it. So my linear induction motor from last year would likely have been disqualified if it…y’know…worked.
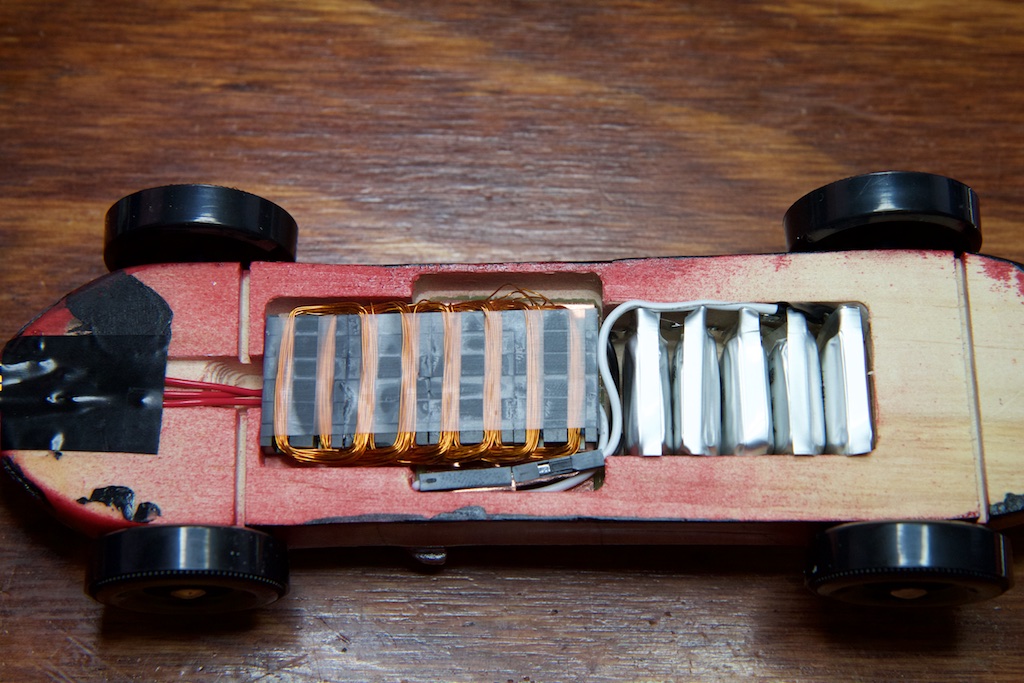
Still looked cool though!
This year, I wanted to try to fit more within the rules. Rather than exploiting the fact that the track is made of non-ferrous yet highly conductive aluminum to propel my car forward, why not just propel the car up?
I actually joked about this on reddit shortly after last year’s race:

And…would you look at that!? The race was on October 21st!
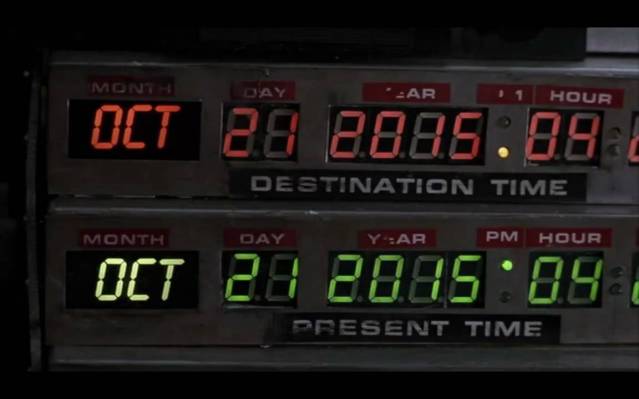
One year to the day after Marty arrived in a very colorful depiction of the past future.
So a Delorean might be a little played out, why not make a hoverboard?
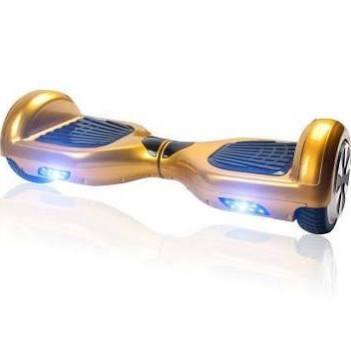
No, I mean a real one…

Yeah! Like that one!
Now, I’ll go ahead and spoil it for you; I never got this design to work. It was still refreshing to review some old electromagnetism theory though, and if you’re curious about how levitating electromagnets work, you might enjoy this post.
When I started researching for this project, I was pretty surprised at how little information I could find online that wasn’t either an opinion of a random forum user or behind some university paywall. I was hoping that by posting everything I figured out in one place, I could make the search easier for the next guy.
If you see any glaring gaps in my knowledge or can think of any adjustments I should make to the design, I’d love to hear about them! Just leave a comment or shoot me an email.
Background
The technical name for what I was trying to achieve is electrodynamic suspension. Unlike your typical maglev train, or sweet floating top:
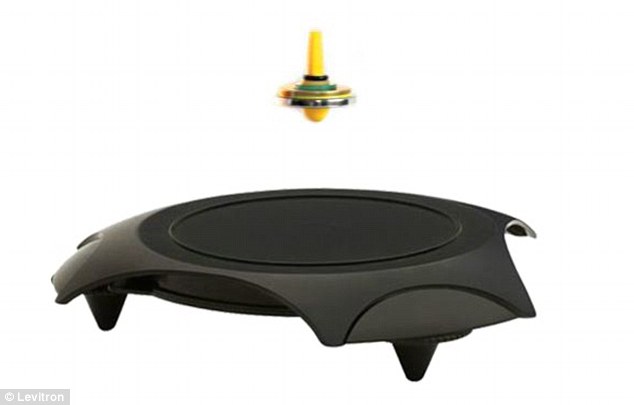
which require permanent magnets to generate a repulsive force, electrodynamic suspension requires only conductors and it uses the magnetic fields from induced currents to generate the repulsion.
Understanding this phenomenon requires a rudimentary understanding of Ampere’s law, Faraday’s law, and Lorentz forces.
Ampere’s Law
Ampere’s law relates the magnitude and direction of the magnetic field in the area around moving electric charges to the rate at which they’re moving. To put it simply, when charges move through a wire (in the direction of the arrow), it produces a magnetic field around that wire as shown below.
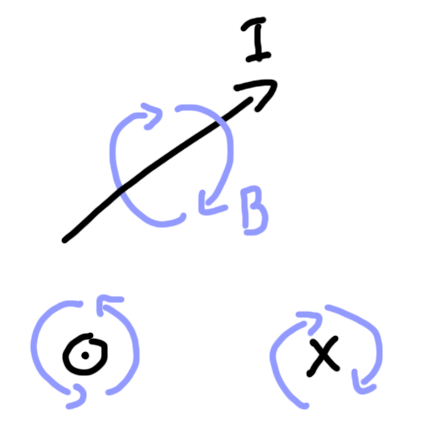
Because these kinds of 3D diagrams can get tricky to draw, there’s a convention for drawing things traveling out of the page as a circle and dot and things going into the page as an X as shown in the bottom two drawings of the same scene.
The relationship between the direction of current and the direction of magnetic fields is important. The convention used is the “Right-hand rule” which in this case states that if you place your right thumb along the path of current and curl your fingers. Your fingers will curl in the direction of the generated magnetic field.
Faraday’s Law
Faraday’s Law (or more specifically, Faraday’s Law of Induction) states that a varying magnetic field will generate an “electro-motive force” (EMF) that will “oppose” the changing field. This force will attempt to move charges in a direction that will generate a magnetic field (via Ampere’s law) that will cancel out the changing magnetic field.
This is important in two ways for our hover board. Firstly, when a varying magnetic field is passed through a loop of wire, it will generate a current in that wire:
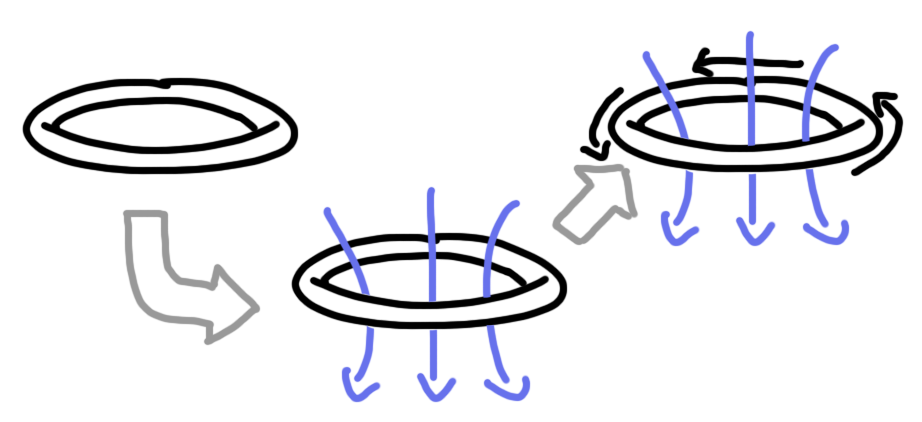
Here we’ve gone from no magnetic field in our loop to a downward magnetic field. The result is a current flowing in the loop induced from the changing field that produces its own opposing magnetic field. Note that these currents aren’t going the direction you expect from Ampere’s law. That’s because the current isn’t generating the magnetic field, the magnetic field is generating an EMF which is generating the current.
In this example, we had some outside magnet create the changing magnetic field, but remember how a coil makes a magnetic field when current is passed through it? You can probably imagine this scenario:
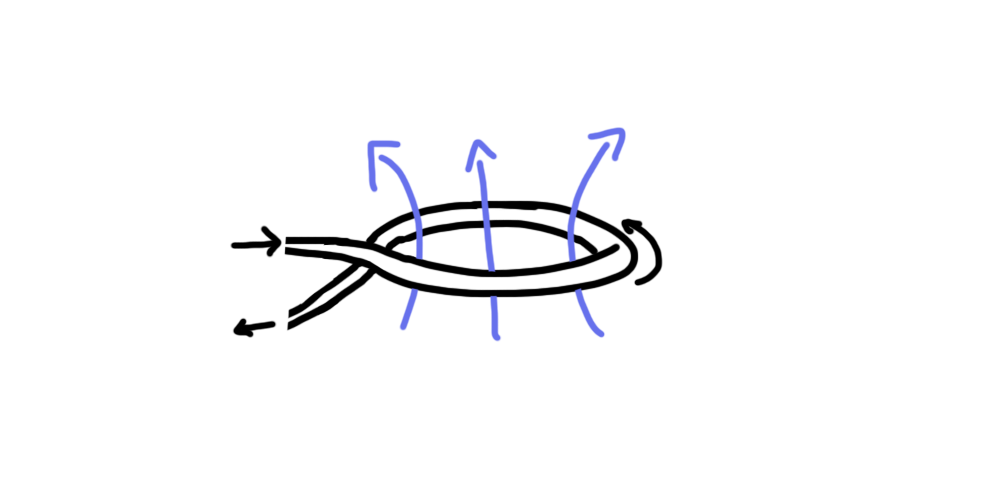
In this doodle, we’re forcing an increasing amount of current through the wire loop and Ampere’s law is generating an increasing magnetic field. Using the right hand rule, you can see how the magnetic field around the wire is grouped into the middle. It looks an awful lot like the Faraday’s Law example, right? That’s because it is.
According to Faraday’s Law, this changing magnetic field in the loop will generate an EMF that goes opposite the rising current in order to “fight” the rising magnetic field. As a result, this wire loop will fight any change in current through it. We call such an arrangement, and “inductor.”
The measure of an inductor is called “inductance,” and it relates how fast the current will change to the amount of voltage applied. The relationship is as follows:
![\[\Large V = L\times \frac{di}{dt}\]](https://ch00ftech.com/wp-content/ql-cache/quicklatex.com-4a09329aed0061ff04d98fa1df289a35_l3.png "Rendered by QuickLaTeX.com")
where
![\[\frac{di}{dt}\]](https://ch00ftech.com/wp-content/ql-cache/quicklatex.com-0d86813498cfc00fc5733480fb6a3e7d_l3.png "Rendered by QuickLaTeX.com")
represents the rate of change of current. In other words, the higher the inductance, the slower the current will change when you apply a voltage.
Technically any piece of wire has an inductance and can be considered an inductor, but we typically bend wires into loops to make an inductor. This is done for two reasons. Firstly, the loop helps focus the magnetic fields through the center, and special materials can be placed in the center which increase the amount of magnetic field you get for the same amount of current.
Secondly, when you create multiple loops in a single wire and stack them together, the inductance goes up as the square of the number of loops. In other words, going from one loop to two loops increases your inductance by a factor of four.

This is because you get to double-dip on each amp of current.
Ampere’s law relates the current in a wire to the magnetic field, but with your wires bundled tightly together, it looks like a single fat wire with double the current. With double the loops, you get double the magnetic field.
On the Faraday side, each loop of wire is “seeing” double the amount of magnetic field and is going to generate double the amount of EMF to fight the current change. Because these loops are connected in series, these EMFs add and so you get double the doubled EMF which works out to four times as much.
Lorentz forces
Finally, we have Lorentz forces. When exposed to a magnetic field, moving electric charges will experience a force. This phenomenon is what pulls charged particles from the Sun into Earth’s magnetic poles and creates the Aurora Borealis and what allows cathode ray-tube televisions to use magnets to bend electron beams to draw images on the phosphorescent surface of a TV screen.
Specifically, the force on the charged particle follows the right-hand rule again. Below we see a charge moving to the right through a magnetic field that is pointing down into the page. If you point your fingers in the direction of the charge’s motion and bend them in the direction of the magnetic field, the force on the charge will point along your thumb. Here that force is represented in green.
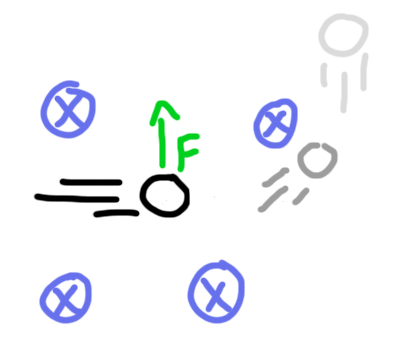
Because of this force, the charge would follow a circular trajectory as doodled in grey.
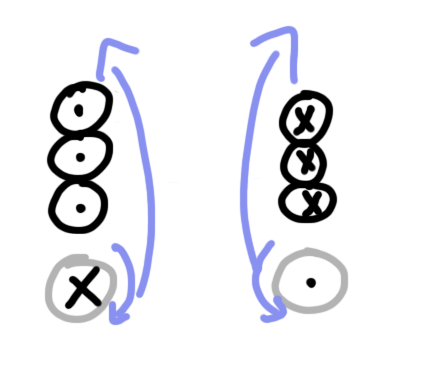
One cool quirk of this law is that two parallel wires with current flowing in opposite directions will be pushed away from each other as demonstrated here:
This is due to Ampere’s law from one wire generating a magnetic field that affects the moving charges in the other wire and vice versa.
Below we have two wires with current moving opposite directions. If we use the right hand rule on the right-side wire, we’ll see that the magnetic field is moving into the page in the area around the left-side wire.
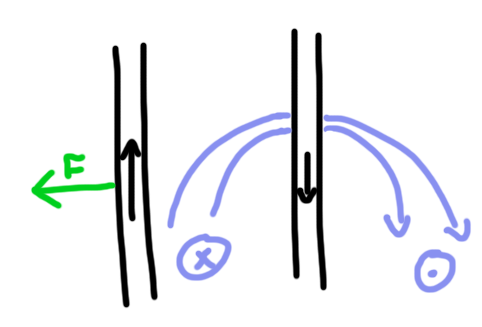
With the charges moving up on the left-side wire (point fingers up) and the magnetic field pointing into the page (bend fingers into the page), the Lorentz force pushes that wire to the left (where your thumb is pointing). In this way, the two wires oppose each other.
Fun fact: This phenomenon was used to create the Ampere as a unit of measurement relating current to the units for length (length/spacing of wires) and force.
So how does the hoverboard hover?
The basic idea behind the hoverboard is to exploit Faraday’s and Ampere’s laws to produce a scenario where the Lorentz forces will lift the car slightly off the track.
The basic setup looks something like this:
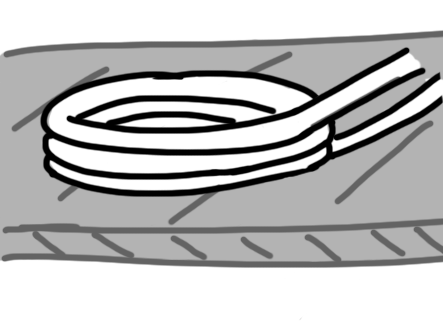
Simply put, it’s a coil of wire sitting on top of an aluminum plate. The idea is that the loop would be somehow integrated with the bottom of my car so that any upward force on the loop would lift my car slightly off the track and let it hover.
To save you the pain of looking at my shoddy 3D doodles, I’d like to simplify this diagram a bit with a cross-section.
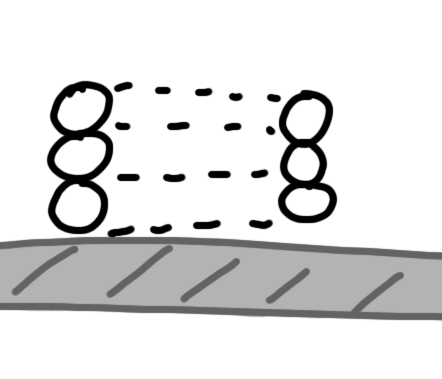
In the context of this problem, the aluminum plate will actually behave as if it were another coil of wire. Charges are free to move around inside a conductor, but as we’ll find, they will tend to follow a loop. The exact size and shape of this loop are a little complicated (more on that later), but for simplicity’s sake, we can model it that way here. Let’s also ditch those annoying dotted lines.

So here we have a few loops of wire and a “loop” of aluminum plate.
Let’s start off by ramping up the current in our wire loop. Shown below is the direction of current which, remember is increasing 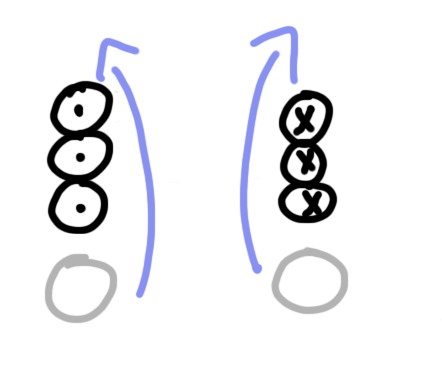
If the wire loops are close enough to our aluminum loop, we can expect a decent amount of the magnetic field to pass through the aluminum loop. Since this current (and magnetic field) are increasing, Faraday’s law tells us that an EMF will be generated in the aluminum loop in an attempt to create a magnetic field to fight this change.
And hey! Look! If we zoom in on part of our diagram, it looks like two parallel wires with current traveling opposite directions!

And as we remember from before, these should repel each other! Done, right?!
Not quite. Note that this only works when the current in our coil is increasing. If we take a step back from the purity of physics for a second, limitations from the real world make this a bad solution. We can’t simply increase current forever. With the amount of heat generated, it’ll catch fire pretty quickly.
Faraday’s law has to do with the rate of change of current. It doesn’t say that the current has to increase.
What if we start ramping our current back down to zero? The current in our coil is still going the same direction as before, but the magnetic field is getting weaker instead of stronger. In this case, the aluminum coil will fight this change by attempting to increase the magnetic field inside the coil:

Now we’ve got a problem. Since the current in our wire is going the same direction as the current in the aluminum loop, they will actually be attracted to each other. That’s no good.
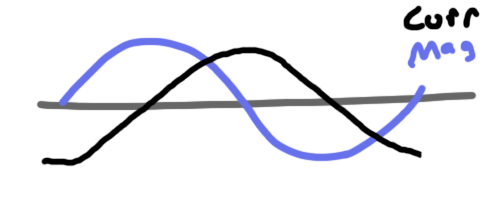
This might be better explained with some graphs. Let’s say we set up our circuit to drive the current in the wire loop with an alternating sinusoidal current. This will generate a sinusoidal magnetic field:
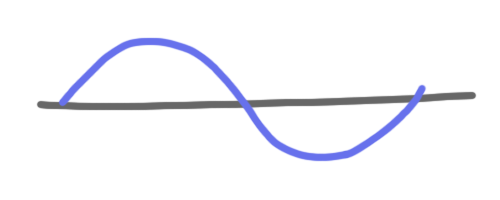
We know that the EMF generated in the aluminum loop will be proportional to the rate of change or slope of this curve. That means it should be zero when the magnetic field is at its highest points, and it should be largest in magnitude while the magnetic field passes through zero. It should also be opposite in sign to the slope of the magnetic field curve since it’s fighting the change.
I’ve drawn this below:
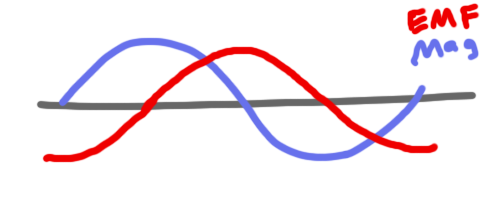
If we assume that the current in our aluminum loop tracks with the EMF, we end up with this:
And here we can start to identify our problem. In the green areas, the current in the copper loop is going in the opposite direction (opposite sign) as the current in the aluminum loop and the two repel. In the red areas, they’re going the same direction and they attract:
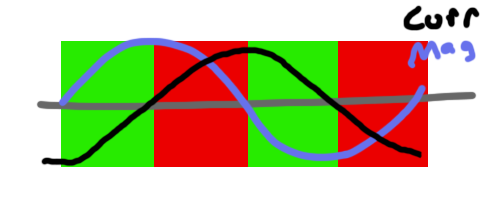
As you can see, the two are repelling roughly half the time and attracting the other half. Doesn’t look like it’ll hover too well with this setup.
But wait! We’ve made a poor assumption. Earlier, I said to assume that the current in the aluminum loop tracks with the EMF. As we know, wire loops have inductance and we know that inductance relates the rate of change of current to the EMF. The induced EMF will not change the current immediately, but it will change the rate of change of current. This has an effect of delaying the response of the aluminum loop current.
If we add a little bit of delay to our induced current, it paints a different picture:
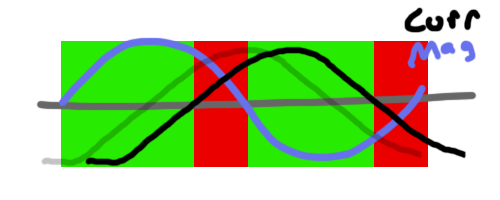
Now we still have repulsion and attraction, but the repulsion takes up a larger percentage of time. As a result, the system will repel. Yay!
Now let’s put it to use.
Table of Contents
Background and Theory
Pingback: Fail of the Week: Pinewood Derby Cheat Fails Two Ways | Hackaday
Pingback: Fail of the Week: Pinewood Derby Cheat Fails Two Ways
Pingback: Fail of the Week: Pinewood Derby Cheat Fails Two Ways – Vloda.com
Pingback: Fail of the Week: Pinewood Derby Cheat Fails Two Ways – Celeb Like
Pingback: Fail Of The Week: Pinewood Derby Cheat Fails Two Ways - SLG 2020
drv3h1
t1ieiz
tbecyi
opddag
ed1673
jylhtp
paqc2q
ato3c5
xtj4kv
xz2lxa
83kcqw
6d4rgf
27fqp9
4tzbo7