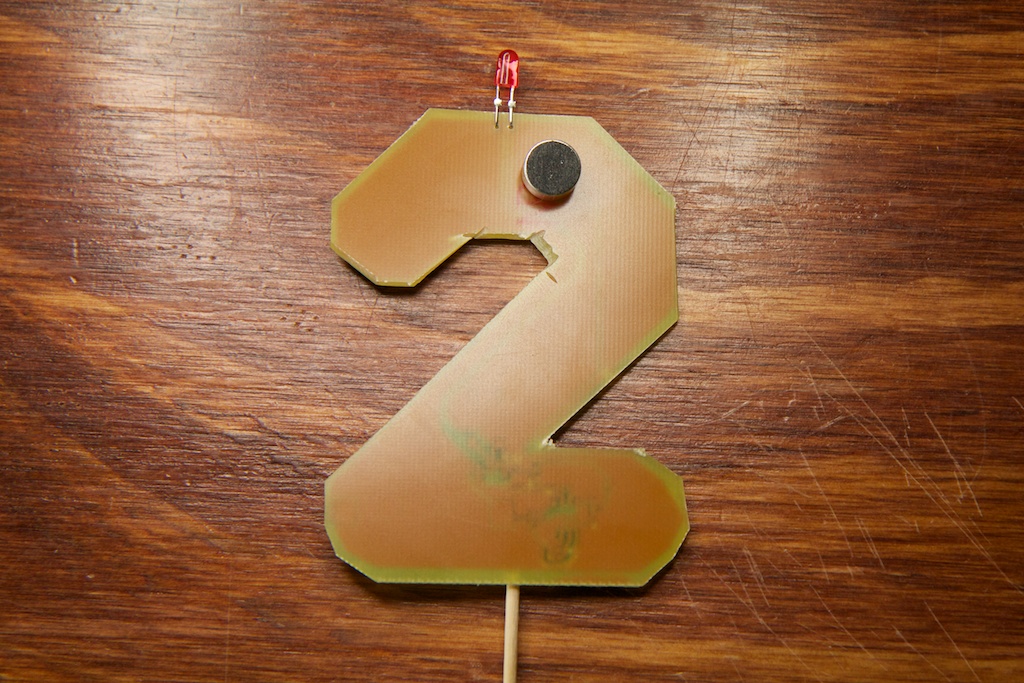
My friend’s birthday was this past week, and I couldn’t find any birthday candles, so I made one instead!
No, she’s not turning 2… I ran out of parts for the 8…
Background
So the concept here is pretty simple. I wanted to mount a microphone on a stick with an LED and design a circuit that would react to a large amount of noise on the microphone input (blowing) to turn off the LED.
This could easily be accomplished with a micro controller, but I thought it’d be more thrifty and challenging to do it with analog components.
Schematic
As you might expect, the schematic for this thing is very straight forward. The device is powered by a CR2016 3V coin cell battery which always supplies power to the circuit (there’s no power switch). If left in, even when the LED is turned off, the battery will die, but I figure for something with such a limited one-time use, it was an acceptable requirement.
Gain and Envelope Follower
The left side of the circuit is the familiar gain stage/envelope follower that you’ve seen in many of my sound reactive circuits. I left the low pass filter in (R6 and C7), though it’s not really necessary. The only difference this time is that there is no gain on the microphone. Typically, blowing on a microphone actually clips the mic which means you’re producing the largest electrical signal possible. I experimented with different gain levels until I realized that anything more than 0dB gain caused the candle to be too sensitive and made it blow itself out.
Originally, I was hoping to flex my analog muscles and make a straight up FET gain stage, but I realized that with a CR2016 battery as my voltage source, there would be too much variability on the rail to set a good bias point.
Flip Flop
The second half of the circuit is a standard BJT flip flop. You probably saw a lot of these in my transistor clock posts. This is a “bi-stable” circuit which means it must always exist in one or two states. Specifically, either Q2 is on and pulling current down through the D2 (the LED) and keeping Q1 off, or Q1 is on which keeps Q2 off. If you try modeling a circuit like this, you might find that it can balance between states, but in reality, this never happens as a tiny bit of noise will cause it to fall into one of the two states.
So once the flip flop is in a state, you have to apply a signal to flip it to the other state. This type of flip flop can also be called a “Set-Reset Latch” which means that you have a signal to “set” it in one state and then a different signal to flip it to the other state (“reset” it).
Typically with this kind of circuit, these signals are low pulses on the bases of the transistors. Imagine Q2 is turned on and pulling the base of Q1 low. If you were to apply a low pulse to the base of Q2 for a moment, Q2 would immediately turn off. While off, current would begin to pass through R5 and raise the base of Q1 turning it on.
Once Q1 is on, the low pulse can be removed, and the device will stay stuck in the alternate state.
I had to change this around a bit because my “set” signal would be a high pulse (the output of the envelope follower) instead of a low pulse. Instead of applying a low pulse to the transistor’s base that is currently turned on, I applied a high pulse to the transistor that’s currently turned off. Once that pulse hit about 0.7V (a diode drop), the BJT would turn on. This is generally frowned upon because for a moment, you have both transistors turned on which can cause excessive power draw as well as instability in more complicated circuits, but for my needs, it works fine.
So I pass the output of the envelope follower to the base of Q1 to turn it on and have a switch connecting the voltage rail to the base of Q2 to turn it on.
The other thing to watch out for is R7 and R8. In order for a bistable circuit like this to work, the load on the collector of each BJT must be more or less equal. For example, if R7 is too large, it might happen that the current through it is not enough to keep Q2 turned on if Q2’s collector current is too big.
Nominally, you’d want the load on each collector current to be a resistive load of approximately equal value, but I didn’t have this option as I had an LED’s diode drop on one side. With a 3V rail, the current through D2 will be about 5mA (
![]()
), so I chose R7 to provide approximately that much current to Q1’s collector. This will only work if the rail is 3V. As the battery dies, the current through Q2 will drop off faster than the current through Q1 because the diode drop won’t change with the battery voltage.
If I wanted to do this right, I’d add another diode in series with R7 (or maybe 3 silicon diodes in series to get closer to 2V), but I designed, laid out, etched, assembled, and debugged this thing in like 5 hours, so give me a break.
PCB
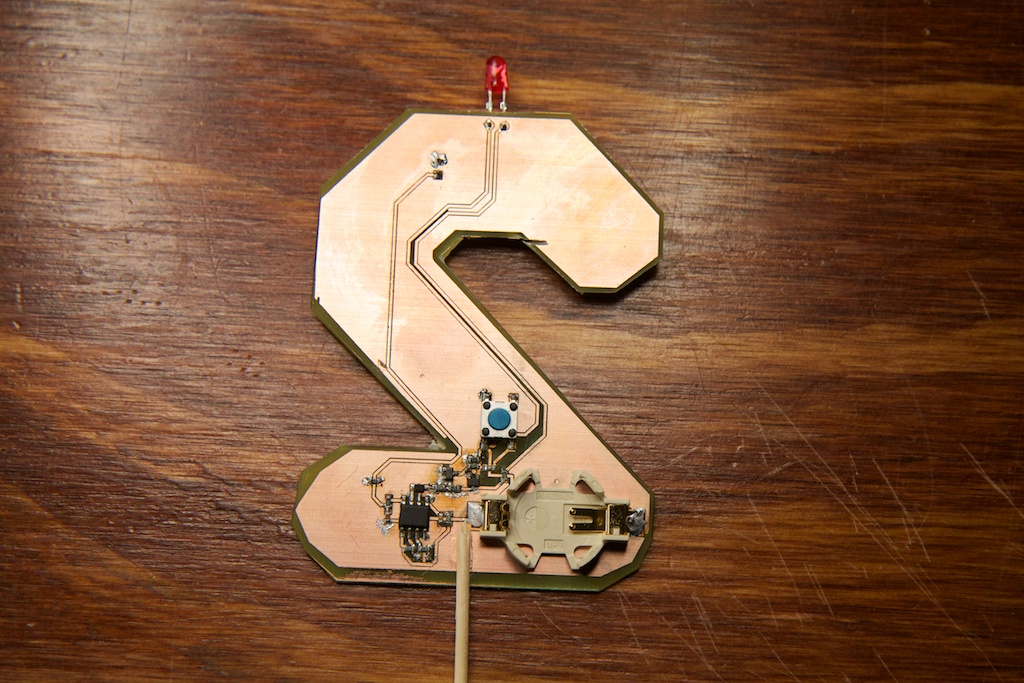
I was pretty proud that I managed to get this whole thing on to one layer with no vias. The only place I had to cheat was with R10, which is a 0
![]()
resistor included just to let me hop over a trace.
I also etched this board with the minimum isolation space between my traces and ground plane. I was in a hurry, and when increasing the gap produced some ground plane islands and disconnected some components from ground, I wasn’t in the mood to start moving stuff around.
I was surprised to find that I only had two or three very small shorts between traces and ground planes. It looks like my PCB printing techniques give me much cleaner boards than I anticipated. The biggest problem was soldering. My soldering iron’s tip isn’t super fine, and any tiny application of heat to the ground plane created a bunch of solder bridges to ground. In some places, I was able to clean these up with solderwick, but a lot of times I just had to go at it with a razor blade. I wonder if there’s an easy way to do DIY soldermask…
The toothpick was a last minute add. I had originally planned to make a small spike out of PCB, but once I printed out the stencil and realized how much of my copper clad that was going to use up, I thought it might be better trim it off and glue a toothpick on with super glue. Of course, it might also not be the best idea to take a piece of fiberglass, dip it in sodium hydroxide, ferric chloride, and acetone and then stick it into something you’re planning to eat.
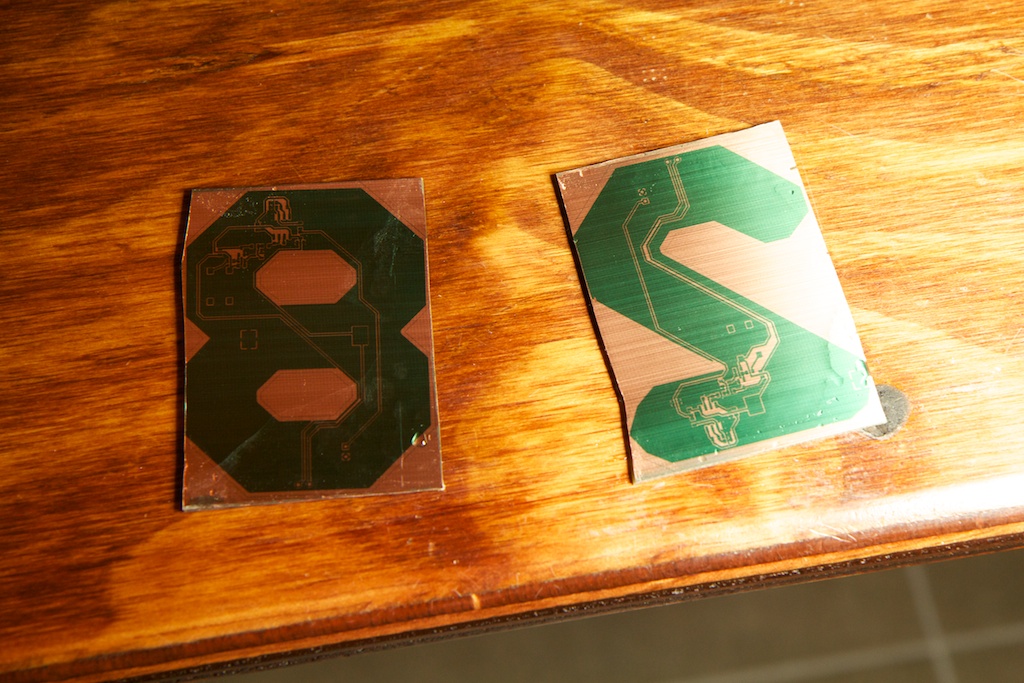
I created the numbers by first placing a gigantic 2 on a blank layer in Eagle and then tracing it with the ground plane tool. I was hoping I could just drop the 2 into the copper layer and have it work, but Eagle doesn’t let you assign net names to text. I can’t imagine too many scenarios where someone would really want to do that, so I guess it’s understandable.
I also created an 8 (y’know, because she’s 28, not 2), but I ran out of microphone modules (and time), so I stuck with the 2. She thought it was pretty cool anyway.
I actually managed to somehow lose the layout file for the 8 (I was in a hurry), so if you want anything other than a 2, you’ll have to lay it out yourself.
Performance
The candle works just like you’d expect. You push the button the turn the candle on, and blowing on it a decent amount turns it off. Because the current through the LED is what keeps Q1 on while it’s in the “off” state, it never quite turns all the way off, but it does drop to a very faint glow that almost emulates the glowing wick after a real candle is blown out. It’s a bug feature!
Conclusion
So it’s not the most attractive birthday candle ever. The microphone module is pretty unattractive. I would have liked to have made it less conspicuous. Though considering I made this thing in 5 hours with parts that I had on hand, it’s a pretty solid device.
And she was definitely impressed!
Project files can be found here: Electronic Birthday Candle v1.0


So romantic! I love it! Make sure the parts are ready when she turns 29!
Rose
Pingback: DIY Electronic Birthday Candle « adafruit industries blog
Hmmm… now I’d like to see this with a couple 7-segment displays that disappeared after blowing on the mic! I’ll put that on my own hack backlog 🙂