The Battery
Not only was this my first project to recharge its own batteries, it also had the special requirement that it had to handle the batteries safely with zero user intervention.
Suicide Circuit
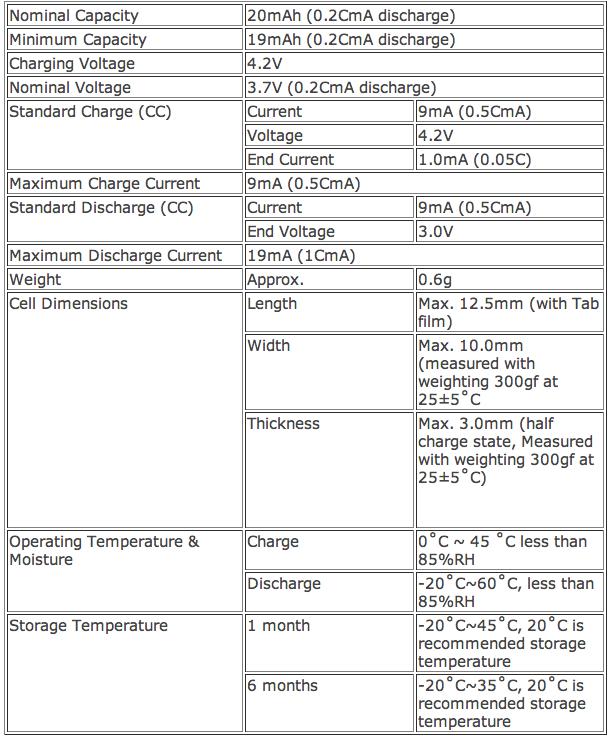
Lithium polymer batteries are pretty delicate. Unlike most non-rechargable batteries where you can just run them until they die, lithium polymer cells have minimum voltages under which they are not to be discharged. Overdischarging lithium cells can have a detrimental effect and severely shorten their lifespan. My batteries had the following specs:
So in addition to limiting my discharge current to 9mA, I also had to be very careful not to allow the battery’s voltage to drop below 3V. This is not a trivial task. I’ve made a number of gadgets before that go to sleep to save battery, but even in a super low-current sleep state, a microcontroller will still slowly drip energy out of a battery plunging it further into the sub 3V range.
These sort of details are usually handled by a special battery protection IC which closely monitors the battery’s voltage, current, and even temperature, and disconnects the battery from the circuit if these stray too far from nominal. Since I had such a well-controlled load, I only really had to worry about over and under voltage protection, and I could even pass off the over-voltage protection to my specially made charger.
A lot of online battery retailers give you the option of adding a battery protection PCB to your battery when you order, but I opted out because I wanted as many options as possible when it came to cramming this battery into a small case.
Shopping around for battery management ICs, I settled on the Seiko S-8241ABPMC-GBPT2G. Phew, that’s quite a part number. The datasheet reveals a huge table of dozens of different ICs with just slightly varying values for under/over voltage or over current protection.
I found it really difficult to find a part that suited my needs as many of these units had over-discharge voltages reaching far below 3V. When I ordered my part, I thought it had an over-discharge voltage of 3V, but that was actually the “release voltage” meaning that after disconnecting the battery at 2.5V (the real over-discharge voltage), it waits until the battery’s voltage rises to 3V before reconnecting it back to the circuit.
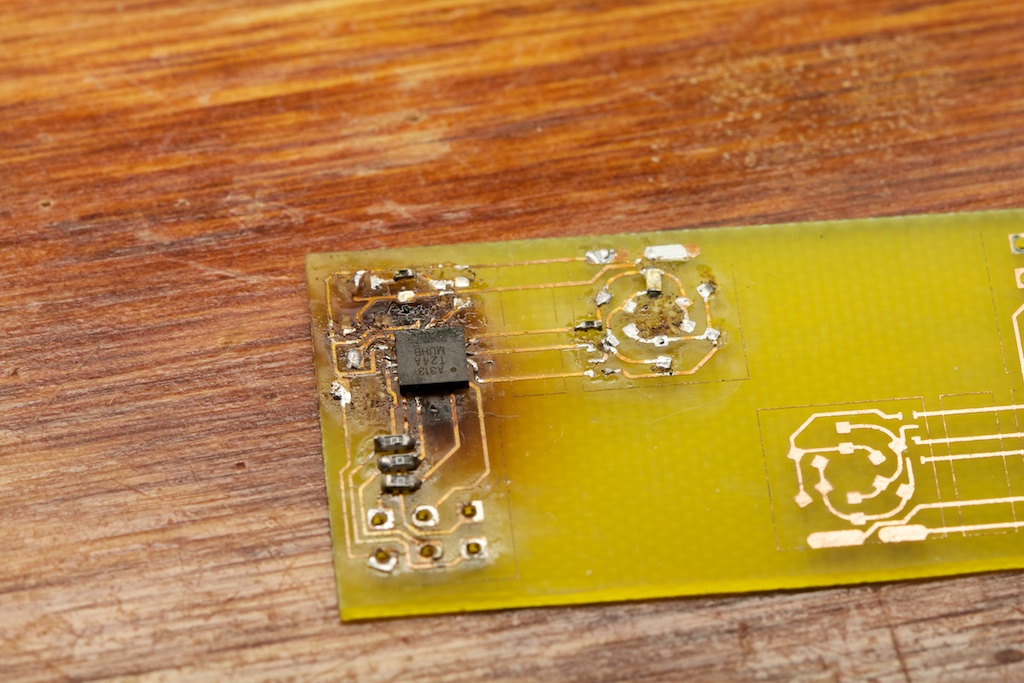
Thus prototype one:
Oh no, wait a second. That’s the prototype that didn’t work because I forgot to connect the hall effect sensor to the microcontroller (more on that later). Let’s see if I can …ah! here we go!
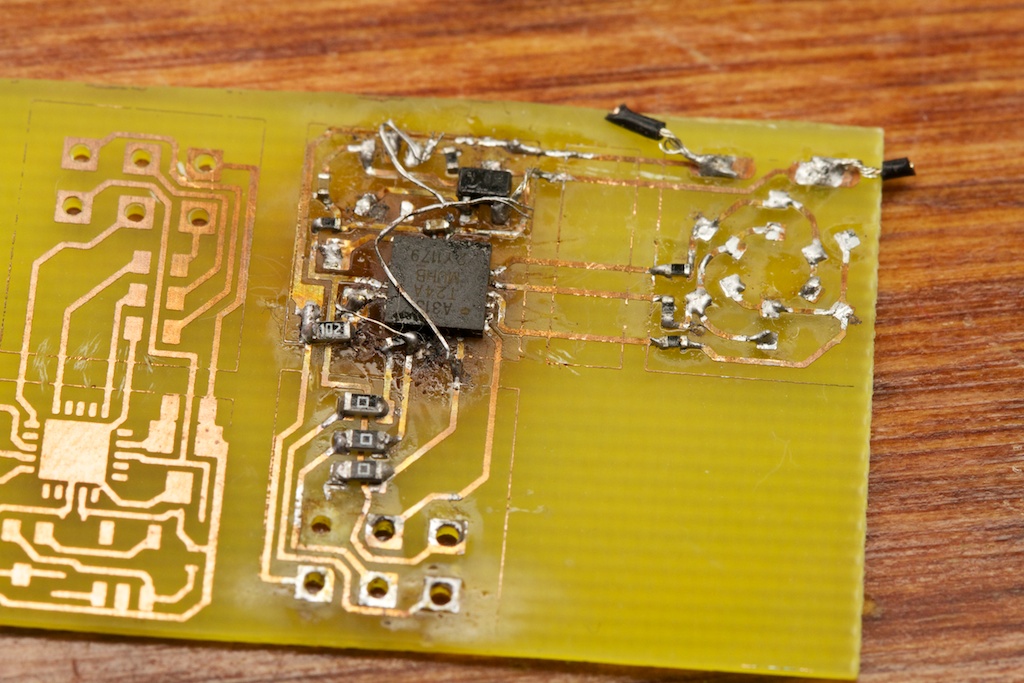
(this image was taken after some reworking and robbing of components for later prototypes)
It’s at this point that I started a reddit thread on the topic and learned that battery protection ICs aren’t really meant for what I was trying to do. They’re meant to be used as a last-ditch safeguard to protect the battery (or user) from catastrophic damage. They aren’t really intended to be invoked every time the device is used.
I’ve always had this irrational fear of working with lithium polymer batteries, but it quickly became apparent that I would need to dive in head first and create my own battery protection solution.
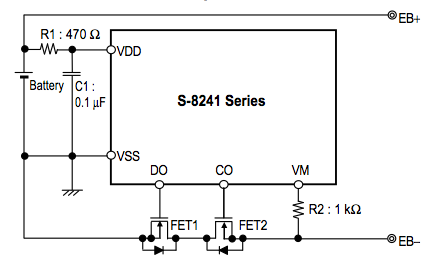
The off-the-shelf battery protection IC is meant to be used as follows:
The two FETs are responsible for keeping the battery connected to the circuit. During an over discharge situation DO falls and switches off FET1 disconnecting the battery from the rest of the circuit (EB+ and EB-). CO performs a similar task for over charging events.
So all I needed was an NFET connecting the circuit ground to the battery’s negative terminal. This FET would then be controlled by my microcontroller which would detect when the battery’s voltage drops below 3V and turn off the FET essentially committing suicide in the process.
After discovering that the battery protection IC wasn’t cutting it, I was left with a PCB that already had an NFET in place (FET1 in the above diagram), so I started playing around with some careful rewiring.
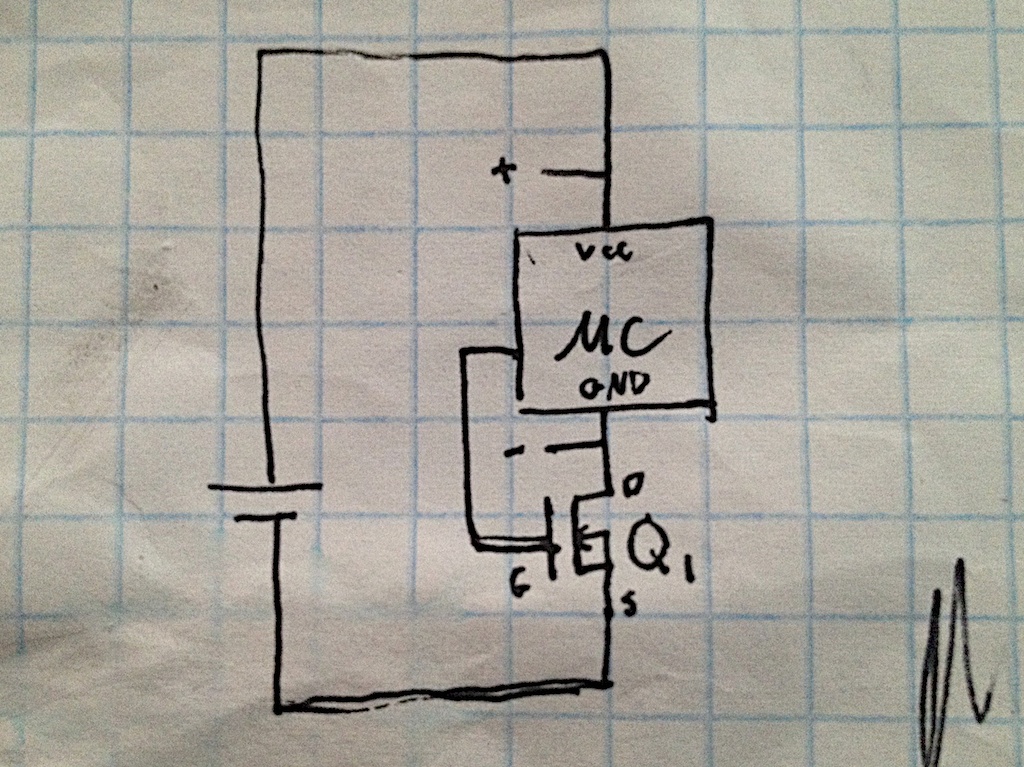
My original strategy was to make a circuit like this:
The idea was that when normally operating, a GPIO pin would pull up on the gate of the NFET keeping it turned on. The FET would pull its drain down and keep the GND pin of the microcontroller close to the negative terminal of the battery.
When the gate was forced down by the GPIO pin, it was supposed to shut off the circuit. Afterwards, if the + and – pins were connected to an external power source, the microcontroller would come alive and be able to pull up on the gate again.
In practice, this circuit didn’t work as planned. As the microcontroller started to drive the gate down, the transistor started to shut off and the drain voltage rose. With the drain voltage (and therefore the ground pin of the microcontroller) rising, there was no way for the micro controller to pull the gate down far enough to shut it off. The end result was a sort of equilibrium where the FET was half way off, and the ground pin of the microcontroller was hovering somewhere around 1V.
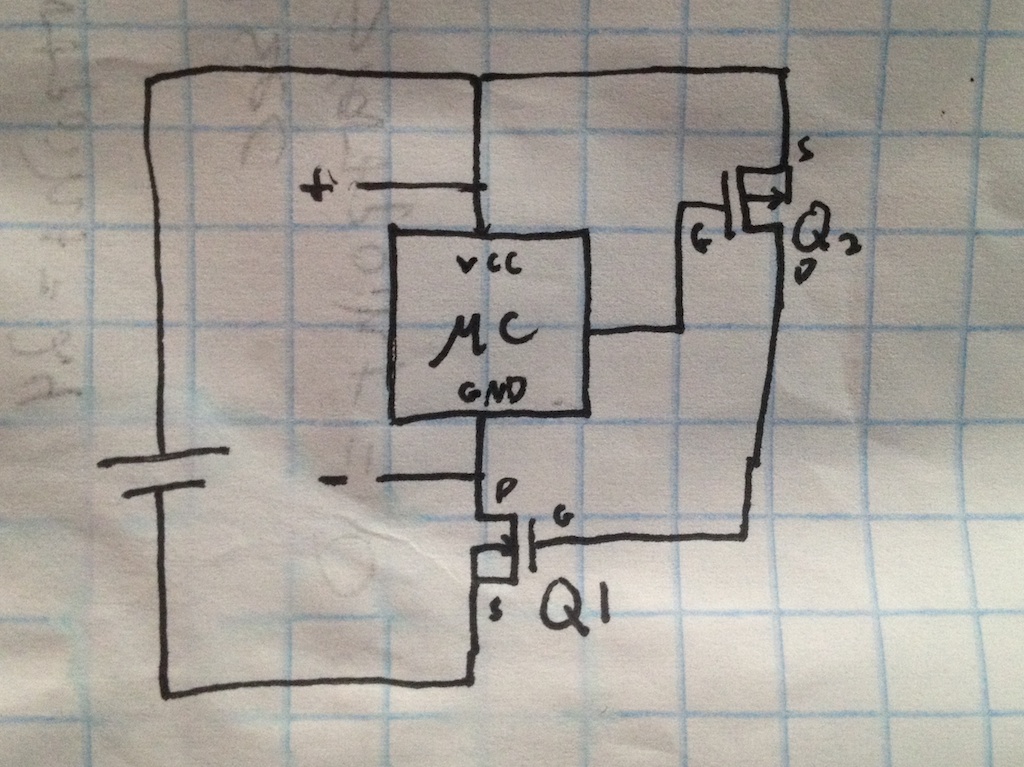
Still playing around with this circuit board, I tried this solution:
The idea here is that since the microcontroller has a direct connection to both the gate and source of Q2, it should be able to turn it off completely. Since Q2 is the only thing providing a voltage to the gate of Q1, shutting it off was supposed to shut Q1 off as well and kill the circuit.
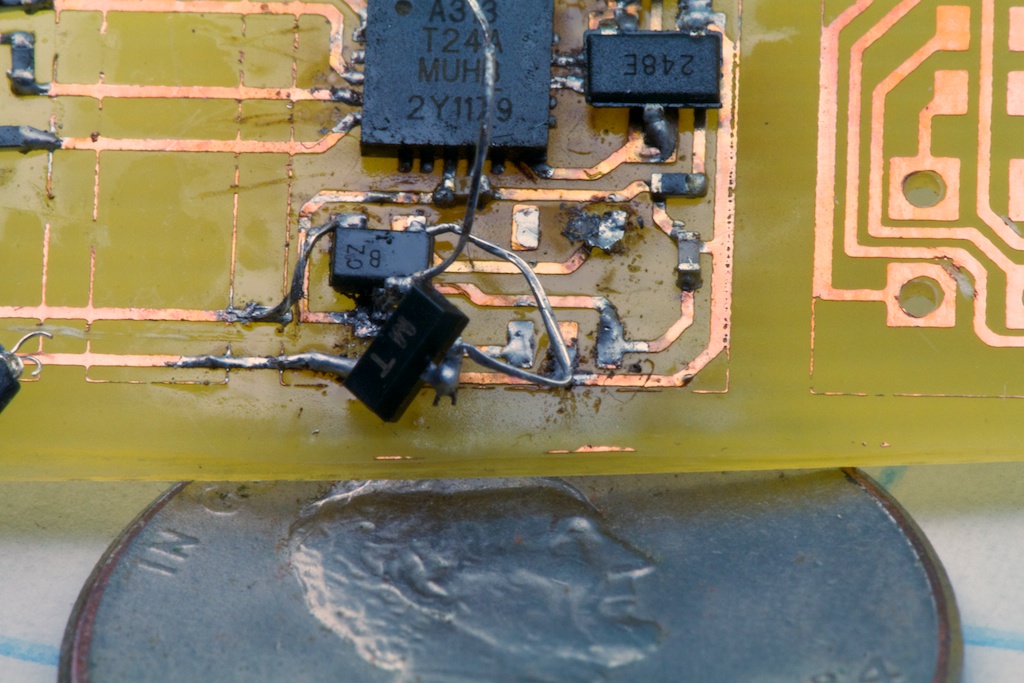
This solution appeared to work. When the microcontroller sent the command to kill the circuit, the current draw of the circuit dropped to near zero. This was good, as the rework job was starting to get out of hand:
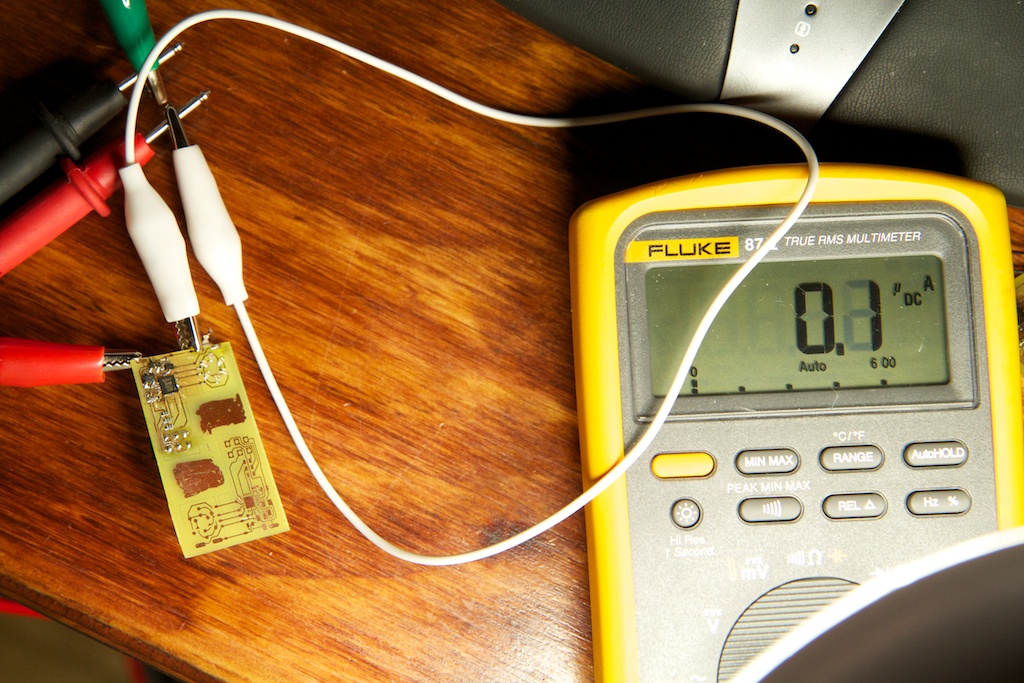
Tired of soldering, I decided to keep the design and start on a new rev of the board without giving it much more thought. I tested this new board a number of times and confirmed that when it decided to switch off the battery, current consumption dropped to zero:
My multimeter always shows around 0.1
![]()
A when it isn’t connected to anything (yes, I realize that the above picture looks like I’m shorting the probes together, but this wasn’t the only test I ran). It wasn’t until after I already had both earrings fully incased in their Sculpey cocoons that I started to see a problem.
The circuits weren’t shutting off! Rather than switching straight to black, the red LEDs inside the earrings started to grow dimmer and dimmer, and I knew they were dropping below their 3V shutoff point.
Carefully cutting the circuits out of their cases, I set to work figuring out what was going on. After what must have been 5-6 hours (it was very difficult to work with batteries that had to be continuously charged and discharged), I discovered that I had a problem similar to what I had with my first solution.
Most of the time when the microcontroller sent the kill signal, things shut off as normal, but if the conditions were just right, it seemed that the circuit could fall into some sort of stable half-on state where it continued to draw current far below the 3V shutoff point.
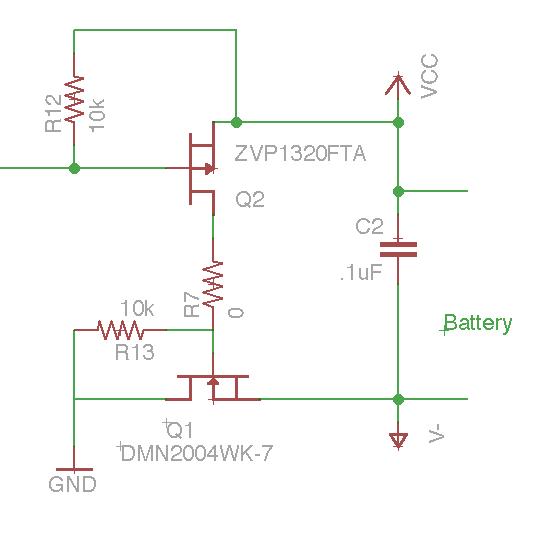
I was going about it all wrong. I was bound to have problems in any situation where I was trying to drive the gates of FETs from a device that’s powered by those FETs. Instead, I needed to make a solution where the FETs will naturally shut off when they are left alone. This is when I came up with this:
(The battery is in parallel with C2.)
The idea is that the line leading off the left side of the image runs to a GPIO pin which pulls down to keep the circuit alive and then just releases (becomes a high-Z input pin) when it’s time to kill the circuit. R12 and R13 then take over and make sure that the FETs switch off. Because they’re pulling straight off the battery’s rails, they have none of the problems that my microcontroller solution had.
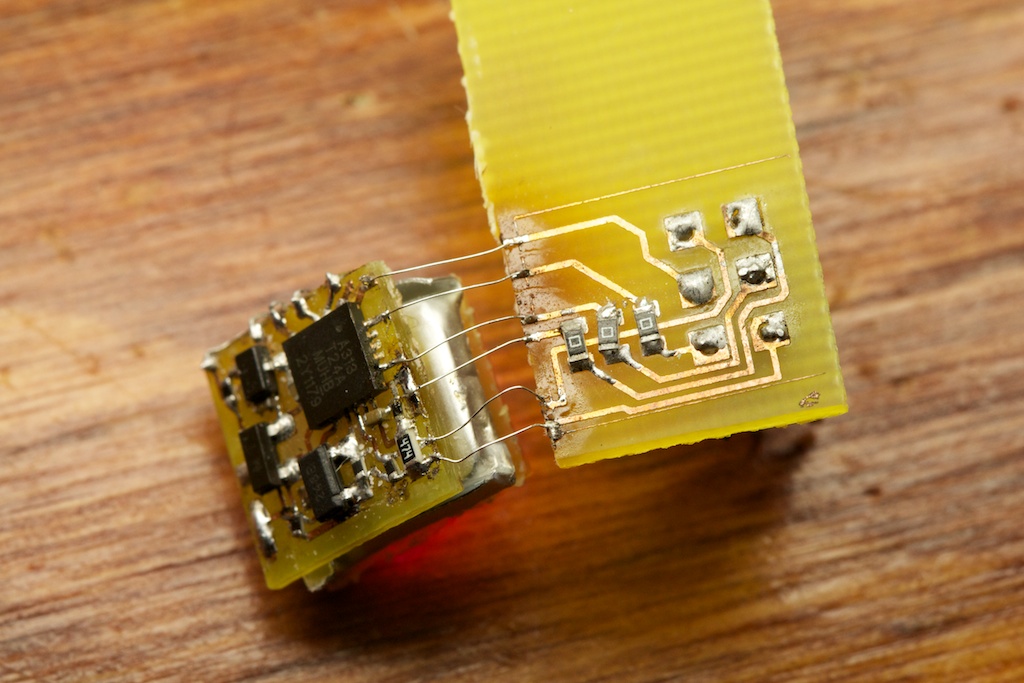
Of course, switching the code to go high-Z instead of pulling up required me to reconnect my programming header. That was a pain:
But the end result was good! It was so good in fact, I was genuinely curious why I didn’t think of it earlier. Pull-up and pull-down resistors are very common solutions for issues like this. The really funny part is that by using a pull-down resistor on the gate, I could have totally stayed with the original single-FET solution and saved myself some board space. Certainly would have been easier to rework.
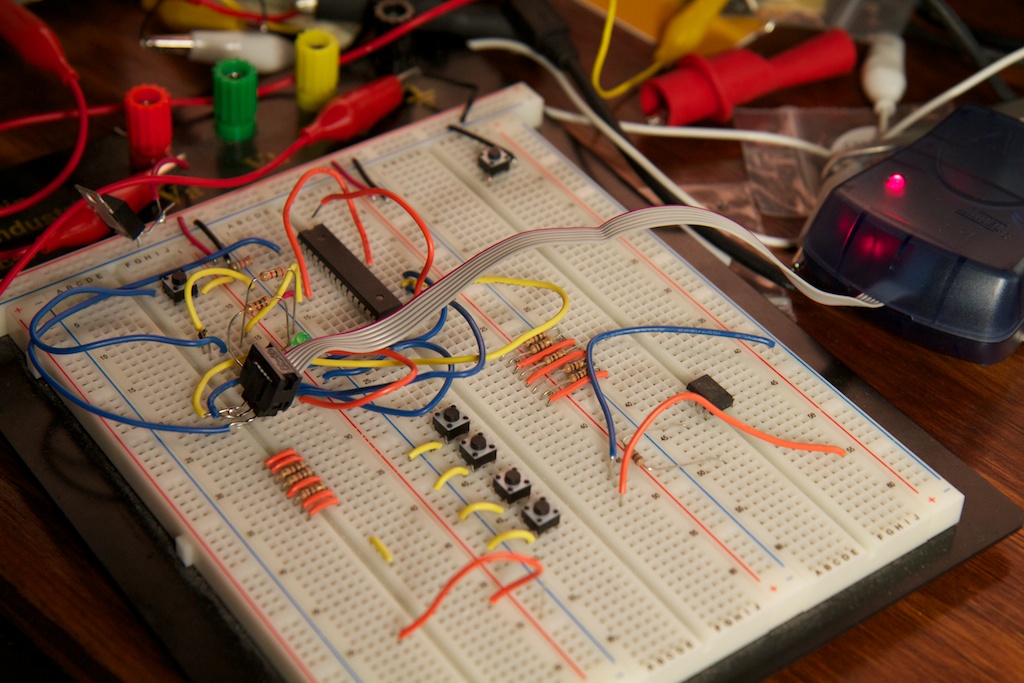
I was so perplexed by my decision to go down the dual-FET route that I performed a quick experiment on a breadboard halfway through writing this blog post just to make sure that there wasn’t any inherent problem with that solution that I came across the first time and somehow forgot about.
Nope, it works great.
Next time I do this, I’ll make sure to do it this way.
UPDATE: No, it doesn’t work great. Details here.

Really nice project! Now get these 3D printed and start selling them on Tindie 🙂
I still shy away from using LiPos for the reasons you mentioned. Maybe I should give them a try as well.
A few comments regarding your circuit:
– when measuring the current draw from your circuit, did you account for the voltage divider (I calculated about 8.5 uA)?
– you don’t actually need a voltage divider at all! Using the ADC mux connect VCC as reference and the 1.1 V bandgap as input. From that measurement you can calculate VCC.
– almost did not see this: so you pull low PB0, right? What about the current flowing through R12?
– when in power-down mode you can still wake up the device with the Watchdog interrupt (see http://www.avrfreaks.net/index.php?name=PNphpBB2&file=viewtopic&t=135288). That way you can configure your MCU to only wake up every 8 s.
Great comments!
-The voltage divider certainly contributed to the 0.45mA draw. Also that measurement was taken before I added R12 (I added a note to make this clear).
-That ADC mux trick is brilliant. I’ll definitely use that next time.
-Someone else suggested the WDT as well. I’ve never used one before. I always assumed it ran off the same clock as the application processor (or at least that it drew more current than that). I’ll definitely try that out next time.
Your break off programmer has inspired me to use that design in a wearable project idea that I have. Awesome and Thank You!
Nice project 🙂
One idea that could help storing the earrings in a charged state would be to use a small reed switch between the battery and the rest of the circuit (while keeping the connection to the charger).
I think you could use it to simply cut the power mechanically instead of having a sensor+code to manage the case.
For over-discharge protection when it’s in its box, you would only have the self-discharge effect to worry about, and that would not be a problem as long as the earrings are used at least once every few month.
Yeah, using the 1.1vref for voltage detection works out all right – it’s not 100% accurate, but if you set your threshold high enough, you don’t risk getting near the bottom end of the discharge curve for the LiPo cell. I’ve been fiddling around with adding navigation lights to my RC helicopters now that the sun is setting so early in the evening, and having the lights warn me before the low voltage cutout in the model kicks in is a design goal, and it’s within a few dozen mV of my goal voltage.
(viz: http://jeelabs.org/2012/05/12/improved-vcc-measurement/ although I’m using a different method.)
And white Sculpey is translucent, huh? I’ll have to give my blinkenlights a shot with it. Right now I’m using some HDPE medicine bottles to diffuse the LEDs a bit, but it’s a bit weird looking. Pressing them into Sculpey and baking it up might look a _bit_ nicer…
It’s actually marked as “translucent” Sculpey. I think the white stuff is different.
Neat project. I really like the coulomb graph.
Pingback: LED Earrings #WearableWednesday | electronics-trade blog
Pingback: Community Corner: RGB Stick Man Costumes and Ten More Great Projects from the Past Week in Adafruit’s Community « adafruit industries blog
Pingback: Community Corner: RGB Stick Man Costumes and Ten More Great Projects from the Past Week in Adafruit’s Community | electronics-trade blog
Pingback: Light Up Earrings
do you have a schematic for the charging circuit? Been throwing around an idea that this battery would work well in.
– K-tWizel
Page 4 has the schematic for the charger. You can also download the .zip file at the bottom of page 5 which contains the Eagle schematic files for the earrings and the charger.
Have some master models of the parts 3D printed. Smooth up the surfaces as needed with some primer and sanding. Then make RTV silicone molds for casting in urethane resin.
Smooth-On has a fairly quick setting white that when cast thin enough, light can shine through.
You could make a multiple cavity mold with only one set of 3D printed parts by first making a small mold to cast one set, then cast several sets from that mold to make one or more multi-cavity molds.
Shrinkage of the resin, especially with small sized items like these, is next thing to zero.
This is an awesome project. I’m also doing really small circuits as well. I’m sure you get this a lot but I need help finding a component. I need something that will detect voltage on a battery to about 2.5 volts. Then after hitting 2.5 volts it will direct the power somewhere until the voltage drops back down to about 1.7 volts. Or something similar to that. I just need to find out what kind of component that would be so I can see what there is to offer. thank you
I don’t know of a specific part that can do that. There may be a number of battery management ICs that can be configured to do something like that though. What kind of battery are you dealing with? What’s your application?
Well I’m actually dealing with a capacitor but treating it like a battery, just for energy storage. The application is a small energy harvester that takes in small amounts of energy over a period of about a minute and then dumps that collected energy into a motor or an LED. I found a part that could do the job but I’m going to test it in a few days to see if it’ll work. The LM8364 seems like it’ll work. What do you think? http://www.ti.com/general/docs/lit/getliterature.tsp?literatureNumber=snvs232b&fileType=pdf
Well, that part will certainly detect when the voltage drops below a threshold, but I still don’t quite understand your application. Will this connect to your charging circuit?
Sorry for the long reply. Basically the circuit has a small solar panel* made up of photo diodes. I’m getting a little over 3 volts in normal room light from the solar panel. In parallel with the solar panel I have a 1200uF capacitor as a battery to store the electrical energy made from the solar panel. I want that stored energy dumped into an LED or a small motor once the voltage in the capacitor gets to around 2 volts. I just finished building the circuit just now and it doesn’t work with the LM8364. But the circuit did show that the small solar panel and the capacitor could power an LED for a few msec. Then, i could have also heated the LM8364 to high when I was soldering it. I’ll test the component now to see if it actually functions.
So after testing the LM8364 I figured out the problem. The component basically detects whether there is enough power to run a processor or not. And in return tells the processor to shut down or turn on. For every failure I learn more about what I’m doing.
Look up Microchip TC54 series chips for battery protection, SOT23 package low-voltage detectors basically. Also, using a RGB LED might be an idea.
Pingback: CNC machine, Christmas gifts, and I’m a dope | ch00ftech Industries
Really good design work, unfortunately the Chinese have unlimited “research” funds
and dirt cheap parts and labor. They are selling beautiful LED earrings on the web for 99 cents a pair. Including shipping!!! Sorry Guys!!!
Pingback: CNC machine, Christmas gifts, and I’m a dope » Geko Geek