Dealing with Size Constraints
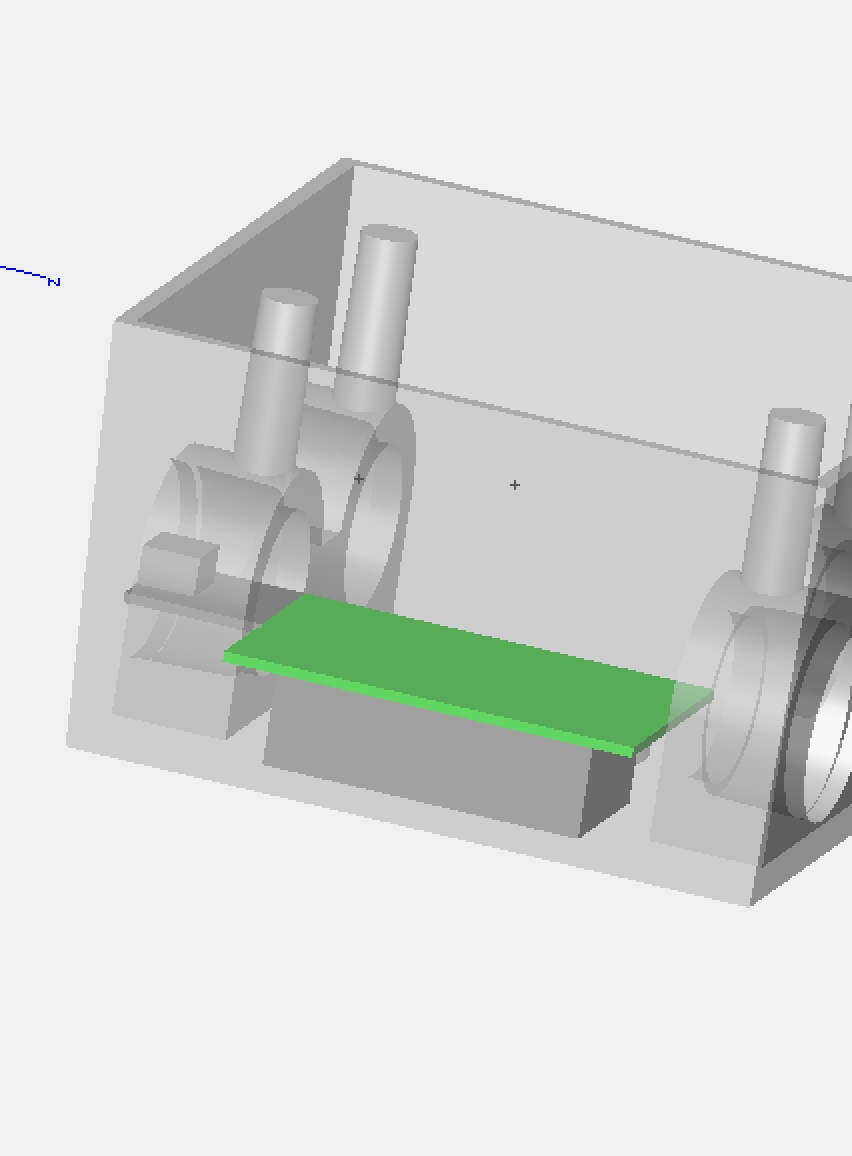
I really really wanted this thing to be super bolted down and durable. While it would be easy to make something that just fits in the junction box, making it secured firmly was a bigger challenge. I already discussed the challenge of fitting the power supply into the box. With the power supply mounted, my situation looked something like this:
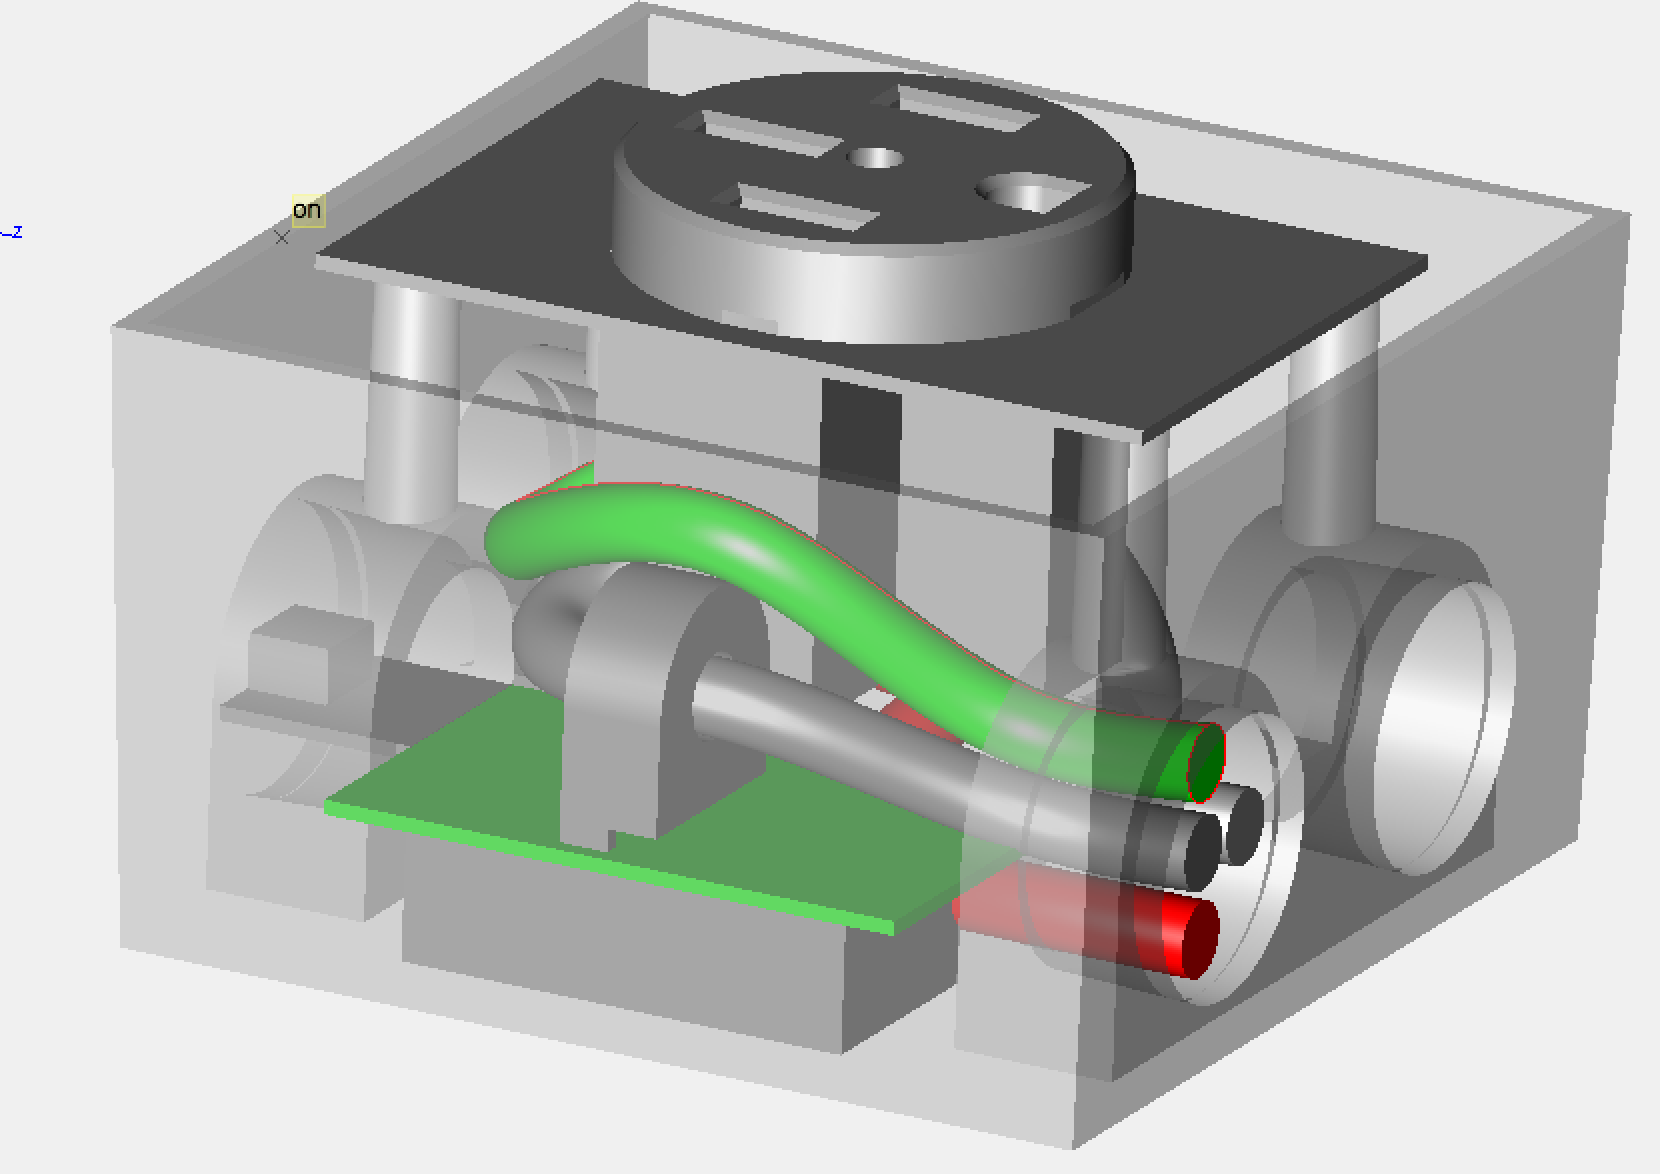
That grey box under the PCB is the power supply. You can see that there’s enough room around the edges for some 16mm mounting posts which is great! The biggest issue is that I had a huge portion of the board where through-hole components wouldn’t work because they’d bump into the bottom of the power supply. Most of the passive components associated with the power supply were through hole, but they could fit around the outside edge. The biggest problem was the current-sense transformer.
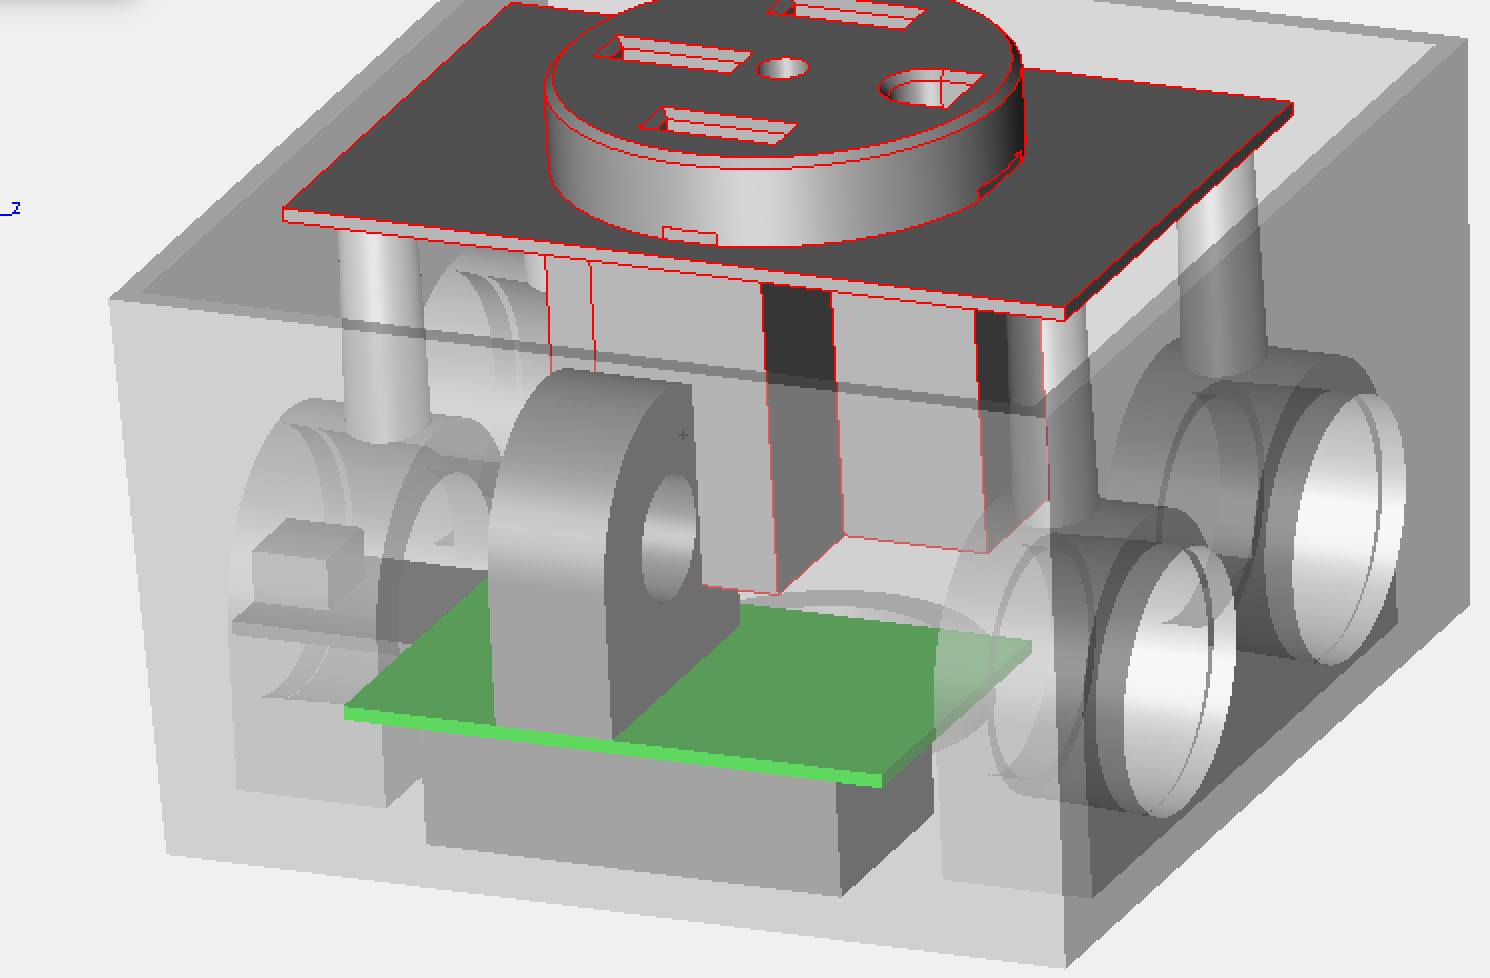
In fact, there were multiple problems with the current-sense transformer. In addition to being through-hole, it was also just too damn big to fit:
Here you can see it intersecting with the outlet housing. No matter where I tried to put this thing, I couldn’t make it fit.
I thought a little more about it and figured that it was okay if I used a transformer with a lower rating. Over saturating a transformer was sure to reduce the accuracy of my measurements, but since I didn’t really need super precise measurements, that might be okay. The next constraint was finding a transformer that had a large enough hole to fit one of the wires in my cable which are about 8.5mm wide each.
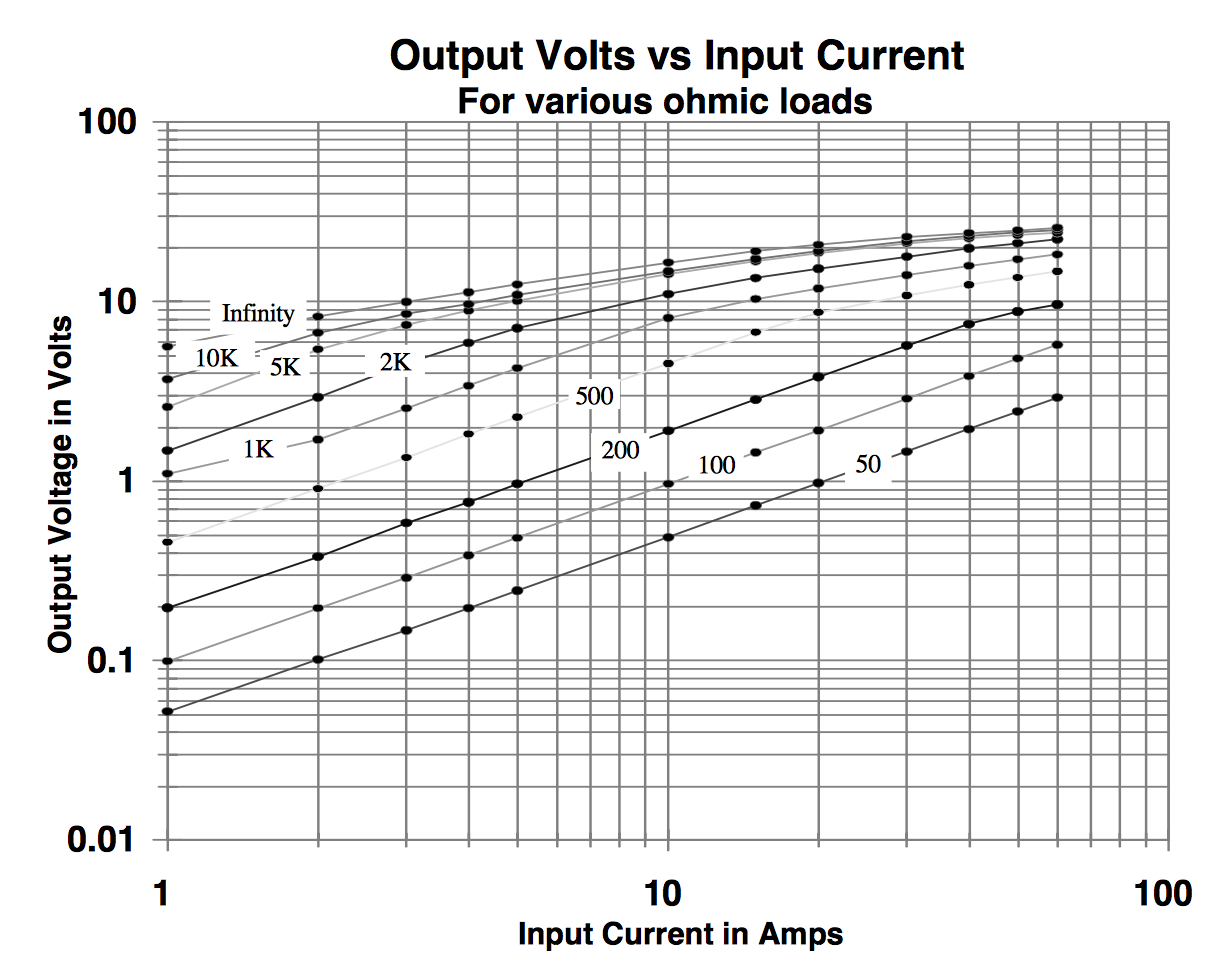
I settled on the AC1020. What’s interesting is if you look at the linked data sheet for the whole series, you’ll find that the AC1005 through the AC1020 are all the same size and have roughly the same performance. Someone in a reddit thread I posted explained that they may make them all the same and just assign them part numbers based on which ones perform best at which currents.
What’s also interesting is that the AC1020 has roughly uniform performance all the way up to 60A!
So it looks like I’m not sacrificing anything by moving to the smaller part.
In my search, I was also keeping an eye out for surface-mount current transformers that I could install opposite the power supply, but I came up empty.
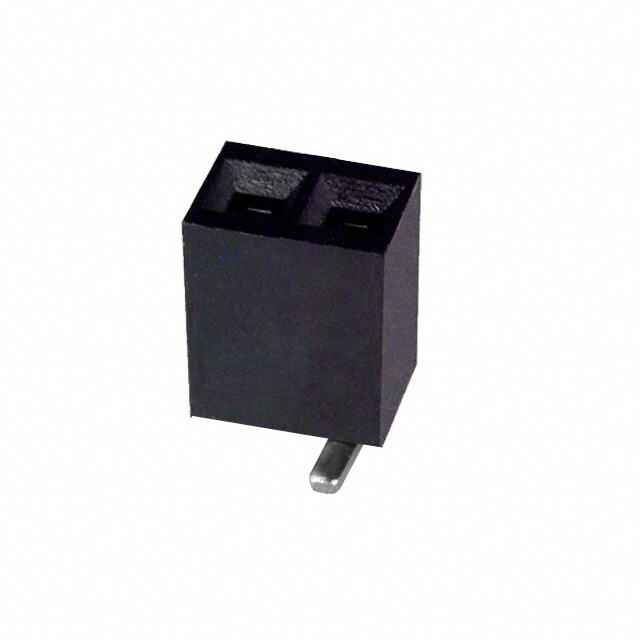
That’s when I realized that I could make any part surface mount with a little SMT socket!
They don’t make these in single-pin variants, so I just connected both pins together and figured it would give me two slightly different mounting positions in case one was intersecting some other component.
This actually ended up really benefitting the design. By making the current-sense transformer connect to a socket, I was able to assemble and mount the PCB entirely separately from the wiring of the NEMA 14-50 socket. I only had to join them in the end.
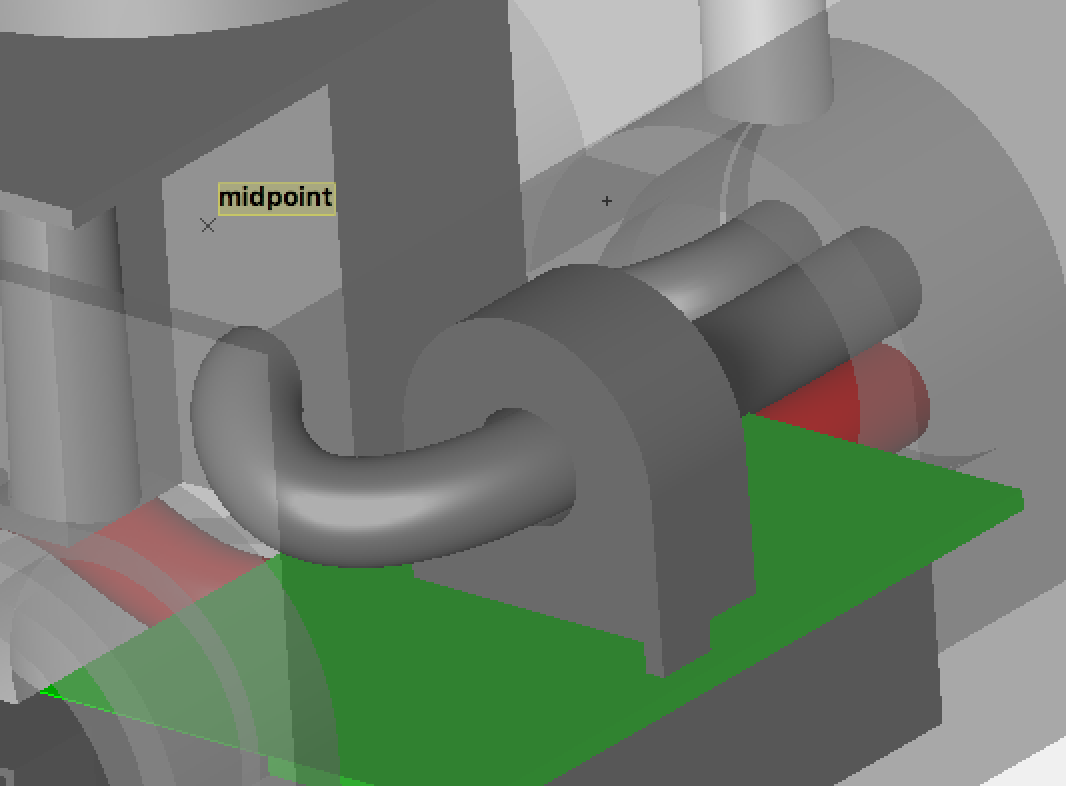
This is the first time I’ve ever tried actually modeling wires in a 3D model. Viacad’s “one rail sweep solid” feature was super useful. Though I didn’t end up using exactly this wiring, it did give me a very good feel for exactly how much room I had to work with.
It was also convenient that the SMT sockets placed the transformer at almost the exact height of its screw terminal on the outlet housing:
Since I didn’t want to print these boards in-house, I was going to need to be absolutely 100% certain of my component placement on the PCB before placing a PCB fab order.
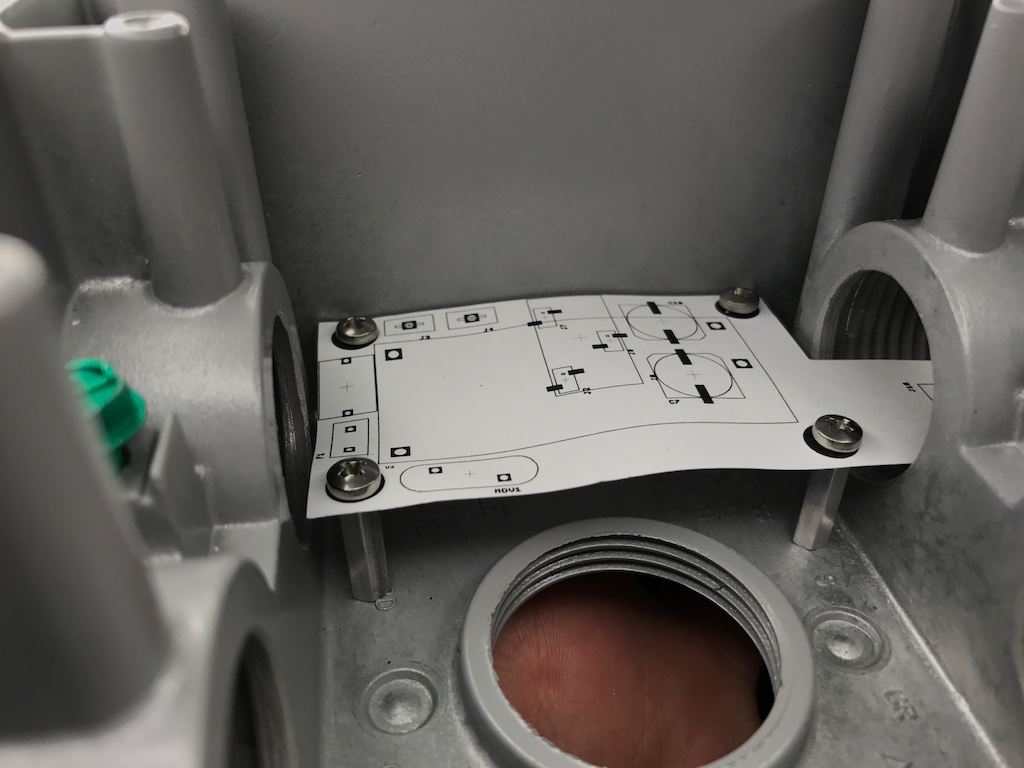
Since my PCB was going to place all of the components relative to its mounting points, I needed to first create some mounting points in my junction box. I took some measurements from my incomplete PCB layout file, and used my CNC mill to drill holes in the appropriate places:
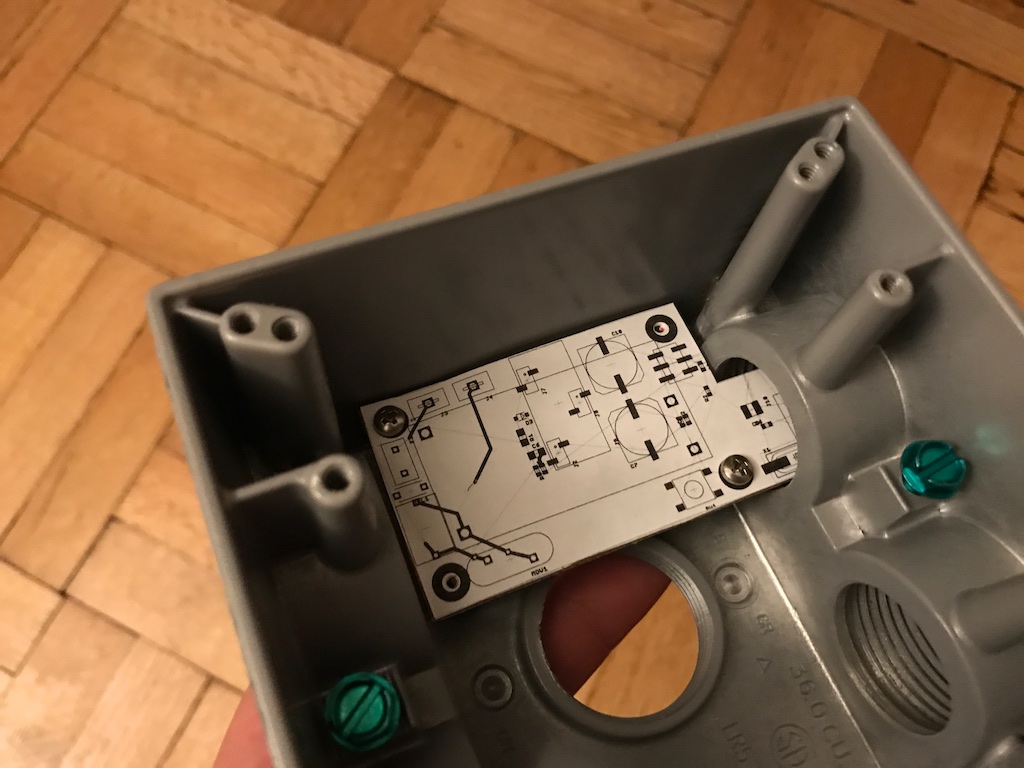
I then printed out a paper version of the PCB to see how it fit:
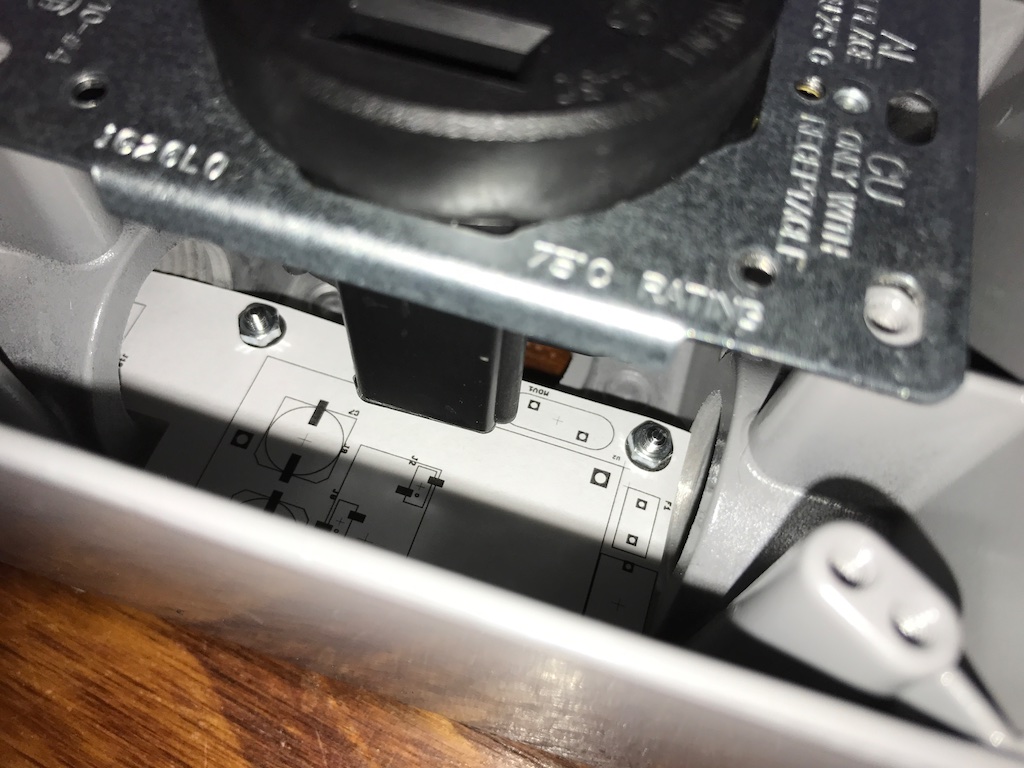
Once I got closer to the final design, I took it a bit further and actually cut an outline out of FR4 and pasted my paper layout to it. I wanted a rigid PCB that actually represented the thickness of the board and the exact location of all components:
Through this process, I learned a few super valuable things. Firstly, the metal can of my clock crystal was pretty much touching the screw terminal of one of the phases in the outlet. As a result, I moved all of the MCU stuff up into the hole near the LED connector. I also realized that my big varistor (mov1) was getting hit by the outlet housing, so I had to move it over a bit.
With everything in place, it was time to finalize the design and kick off production!
Bring Up
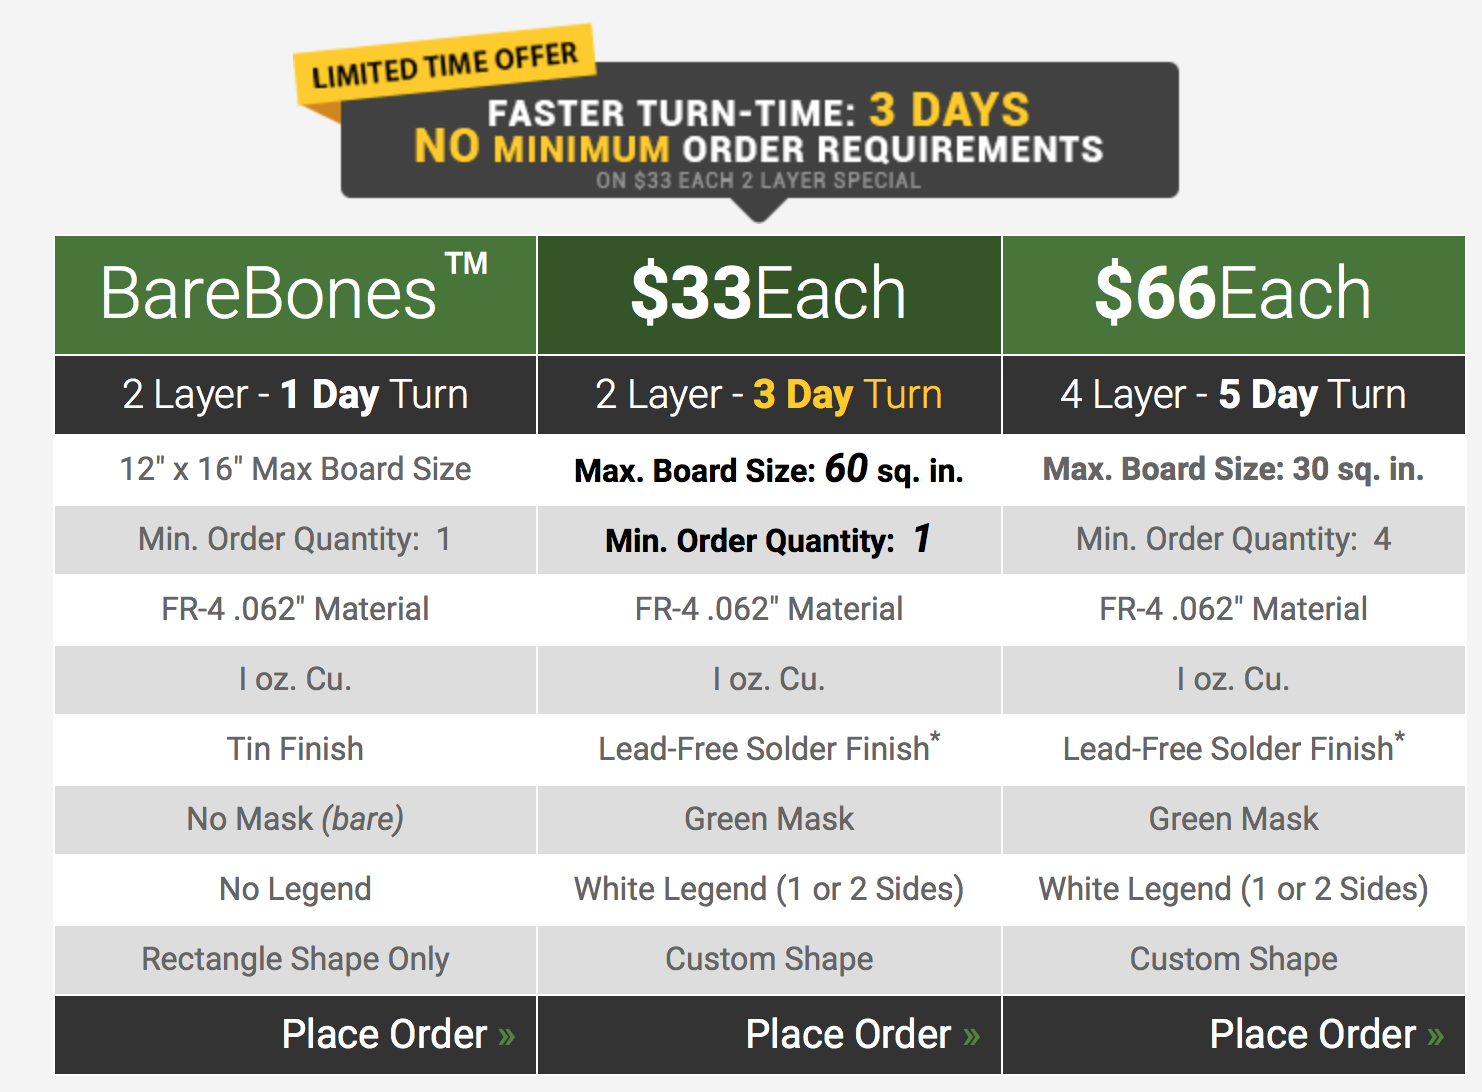
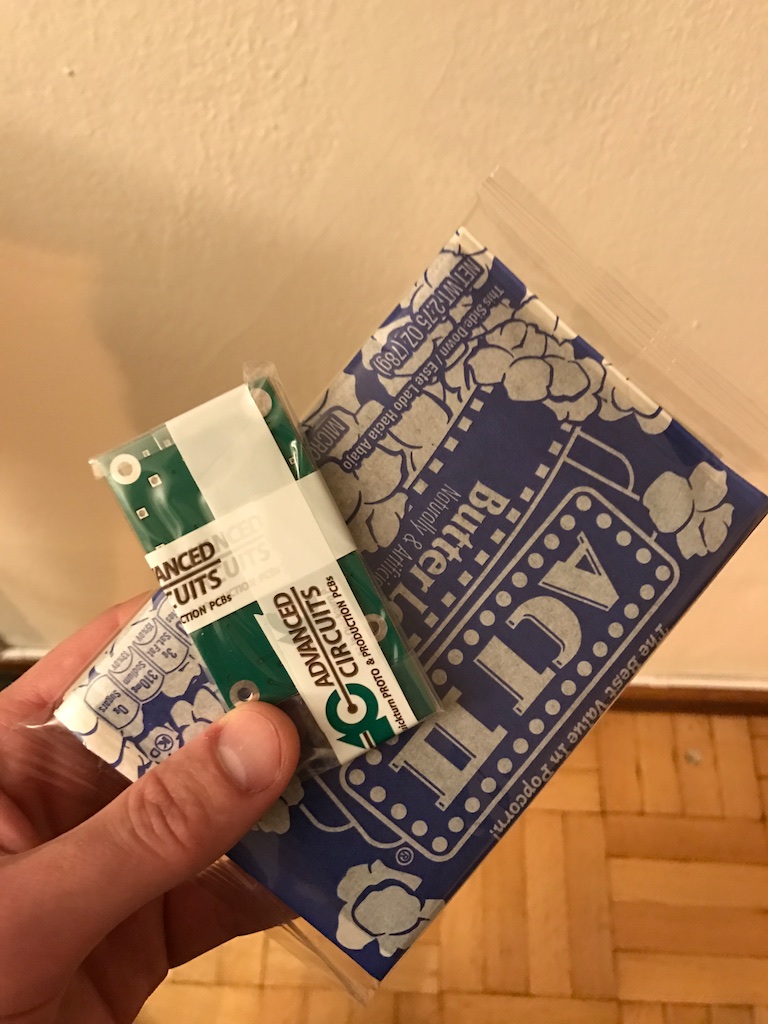
When there’s a tight deadline on a project, I usually turn to Advanced Circuits. I’ve been using them since college. For simple two layer designs, they have a “$33/each” deal with a 5 day turn and an minimum of 4 PCBs. I was lucky enough to order in time for their limited time only 3 day turn deal!
Though minimum order quantity was just 1, I ordered two just in case. I also ordered crazy hyperspace shipping from UPS which actually ended up costing more than the PCBs themselves. Though expensive, a Monday morning order left me with PCBs in hand the following Friday.
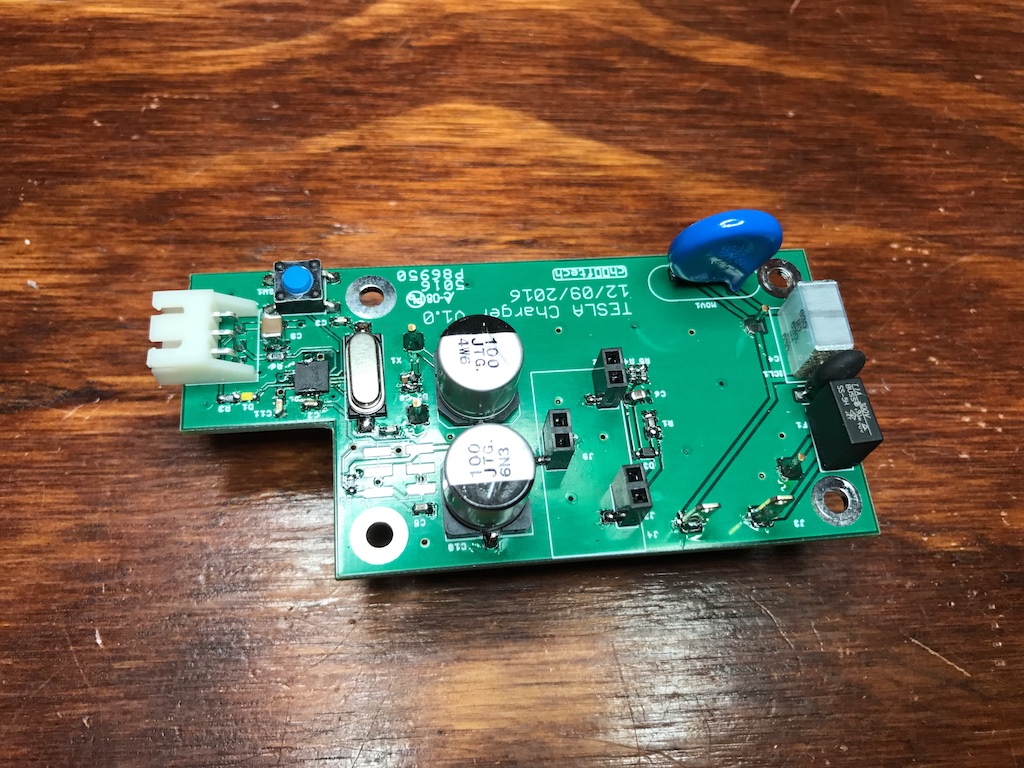
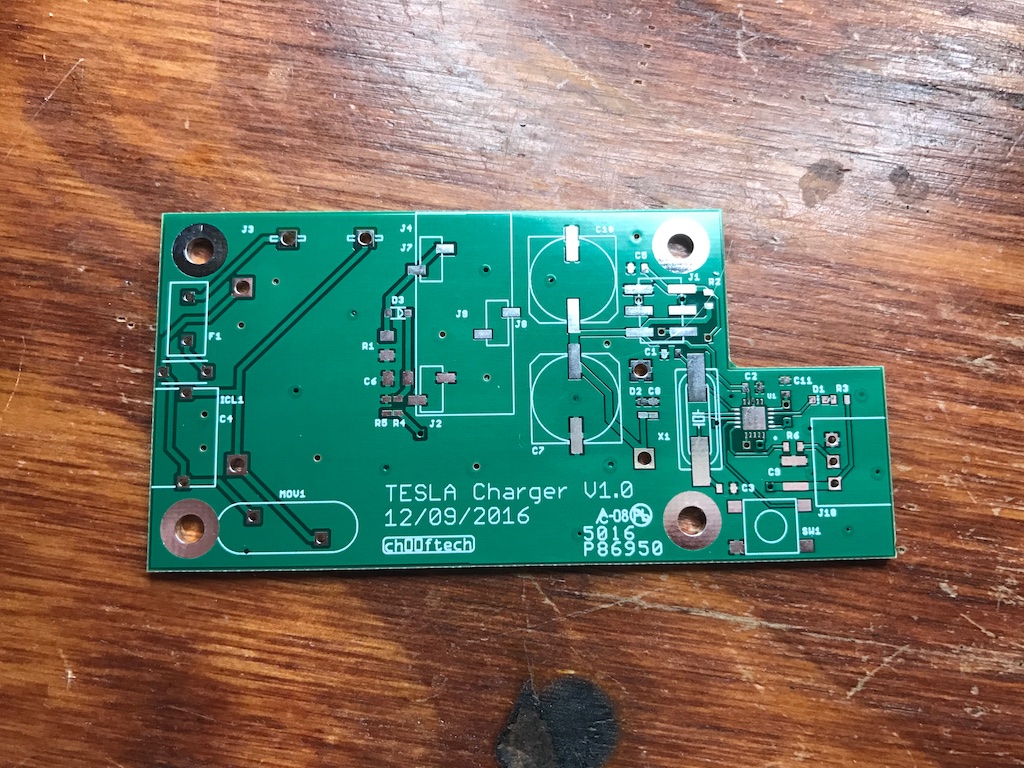 The board flew together pretty quickly:
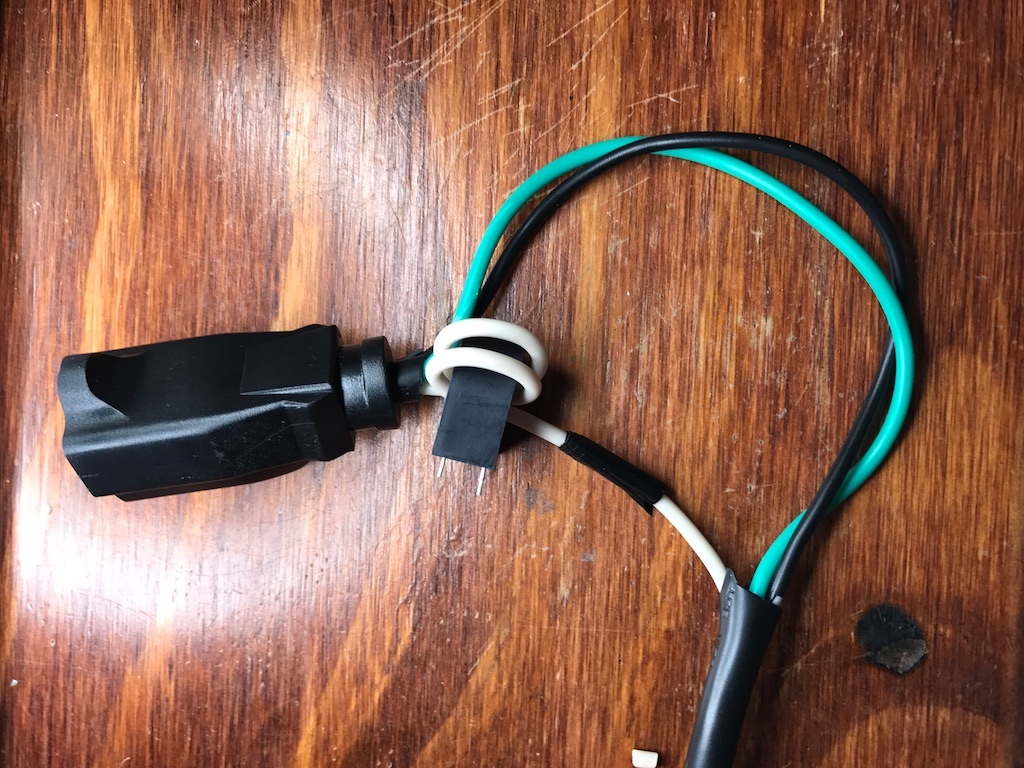
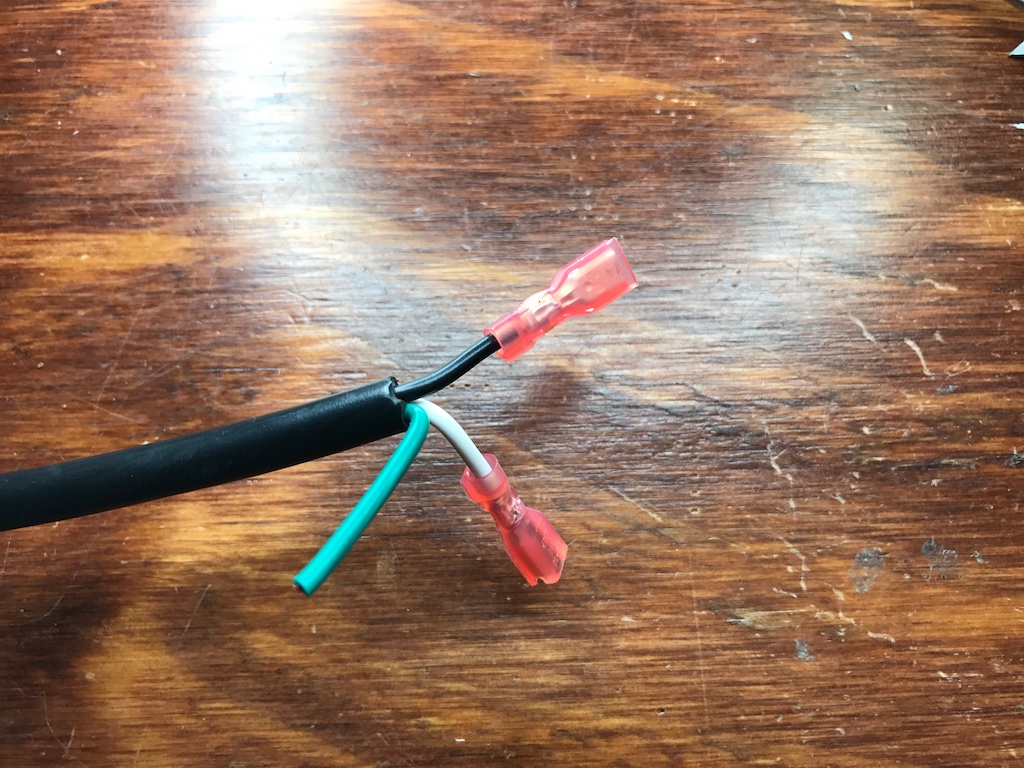
It connects to power through two quick-disconnect blades. I cut apart a PC power cord to make myself an adapter:
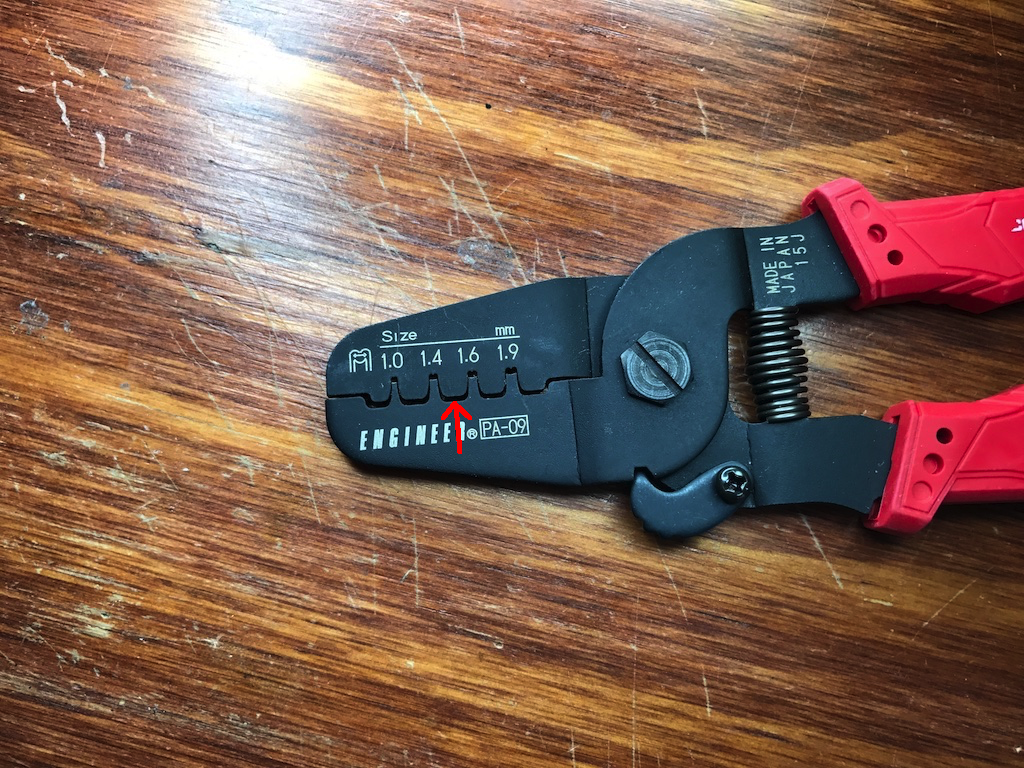
There are special tools for crimping these, but I found good success using the gaps between the crimps in my generic crimp tool.
Crimp crimp crimp.
Testing this this took a little bit of thought. I certainly didn’t have a Tesla on hand, and in fact, none of the appliances in my apartment draw much over 10A. In fact, I learned this winter while running a radiator and space heater at the same time that my entire apartment is powered off a single 20A fuse.
The good news is that three passes through my current sense transformer can make a 10A draw look like a 30A draw. I modified an extension cord to do just this:
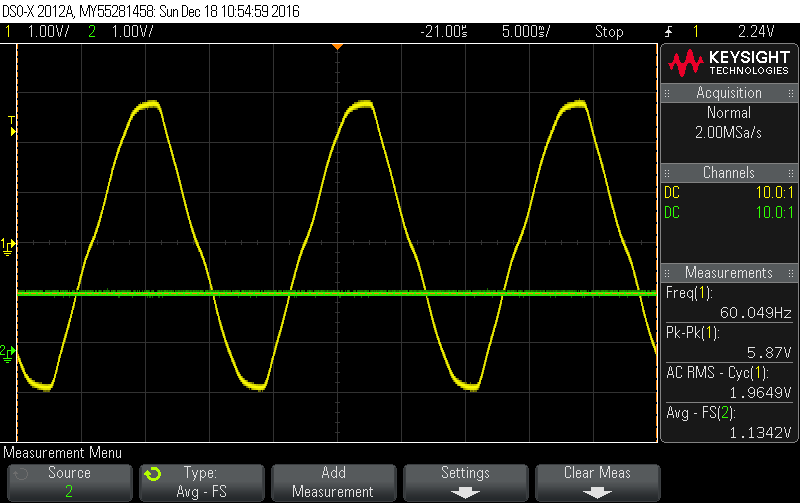
 With a space heater plugged into my Kill-a-watt power meter and that plugged into my extension cord, I took some measurements with my oscilloscope. Here’s what the current sense transformer voltage looked like along with the output of my half-wave rectifier when the space heater was drawing 6.63A:
6.63A with three passes of wire works out to roughly 20A of current. Since my design uses a 100
![]()
load resistor, the data sheet says that the curve should have an amplitude of about 2V. Remembering that we’re dealing with RMS measurements, I’m just about perfect at 1.9649V.
The peaks are at +/- 2.935V. Dropping 0.7V due to my diode and another division by two from the resistor divider gives you 1.1175V which is more or less in line with the 1.134V measured.
Cool! Now on to some firmware.
Table of Contents
Size Constraints and Bringup



Very cool, nice job!
Slick project! Don’t have a tesla myself but could use some of your ideas for my future projects.
Pingback: Animated EV Charge Cable Enlightens Us | Hackaday
Pingback: Lit Up & Animated Tesla Charging Cable Is Coolest Homemade EV Device We've Seen - Video
Have you ever thought of working with a firm like evannex.com to make this a product? Or of building these for other folks ()I’m about to get a model S and would love to have one). Even if you sold a kit of the parts, with instructions, that would be cool. Or (better yet) sold the assembled unit that plugs in, and let the purchaser assemble the cable, LED strip, and loom part.
POE provides PCBA assembly, low to medium MASS production volume.
https://chinapcbsmt.com/
Pingback: Hijo regala a Tesla Dad con un impresionante cable de carga brillante para las fiestas | Teslita.net
We provides OEM production services, including PCB, PCBA, from design, procurement, proofing to mass production, etc. to provide a series of complete services to ensure the smooth progress of the project in the production stage!
thank you very much, i like your article, it can help me
http://www.kingfordpcb.com
Amanda just viewed your profile! More info: http://inx.lv/GkWu?h=f36c4c19a87d1f9f56d5deb1d1bc4709-
x7e3yd
hgte3s
9o8rpm
We provides OEM production services
jv06tx
5nxi8p
1exafm
f4oe68
80bmls
o7uooq
shcrbq
h6roz3
3pjdfm
299d37
ih8sl7
6v7x6p
v1p4tc
q37td4
tseoww
yyuqxp